A view from my bedroom

Gluten-free Layered Chocolate Cake with Clementine and Cognac Whipped Cream
I love December, it's the season of festive eating not to mention the one time it's perfectly acceptable to pile on the pounds without comment. So far I have had several Christmas dinners in the form of Latin-style tapas, traditional four-course vegetarian meal Exeter-College style with carol singing in-between courses, Asian buffet and two house ones in the guise of "practice" and "real". Other things I get excited about this season are the carol services by candlelight and festive craft evenings where delectable canapés are served around talented women. This year I failed to make an appearance due to going on a last minute dancing weekender which was fantastic, but not before leaving my canapé contributions for the church. Last year I went for tomato and basil puff pastry stars but this year I went for slightly more daring and chose: savoury filled mini palmier, goats cheese filled profiteroles and mini cheese and tomato filled scones (Recipe below). My house mate and I were just discussing how at first sweet things are gushed about but without fail, the savoury (unless they're boring dry sandwiches) bites will always go first, why is that?

My Canapé selection for the Craft Evening
I had great fun making the canapés, especially the palmier which were easier to do than I imagined. They will definitely be made again. The Profiteroles as you can see from the photos are unfilled, and I don't recommend filling them until they're ready to be served as they then can't be re-crisped in the oven. Upon saying that though I tried one (or five) filled after a day and although not crispy they still had a wonderful taste and texture, they're just that bit nicer straight out the oven. With that I leave you with a handful of canapé recipes, and a cake recipe which is coeliac friendly that I made for our "real" house Christmas dinner.
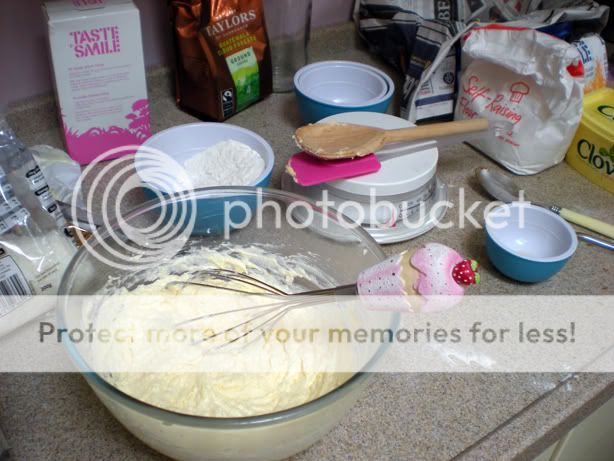
Layered Chocolate Cake
(Serves 10)
Ingredients:
Cake:
- 250g Dark Chocolate (around 70%)
- 190g Butter/Margerine
- 3Tbsp Rum
- 125g Ground Hazelnuts/Almonds
- - Flour can be used if not required to be gluten-free
- 5 eggs
- 190g Granulated Sugar
- 1tsp Baking Powder
- 4-6Tbsp Apricot Conserve
- Icing to dust
- 300ml Double Cream
- Zest and Juice of 1-2 Clementines
- 1Tbsp Brandy
- Pre-heat the oven to GM3/160C/325F and line a swiss roll/baking tin
- Over a double-boiler, melt the chocolate and butter together gently, stirring until smooth and glossy. Remove from heat and stir in the alcohol if using.
- Meanwhile, whisk eggs and sugar together until the mixture thickens and falls in thick ribbons rather than a thin stream.
- Gently fold in chocolate mixture until no streaks remain and repeat with the flour.
- Pour into the tin and level, then drop carefully from a height of about 10-15cm to remove large air bubbles and bake for 20-30 minutes until a skewer comes out with a few crumbs on. Leave in the tin to cool for 5 minutes.
- On a cooling wrack, place a liberally pierced baking paper to line it and transfer the cake onto it to cool completely. Score across the long part of the cake to divide it into three equally.
- Once cool, cut one slice and transfer to serving dish/board. Beat the apricot to loosen and spread liberally across the sponge. Top with a second piece of cake and repeat with the jam and top with the final piece. Trim the ends to neaten and dust with icing sugar and Clementine zest.
- Cream: To make the cream, pour everything into a jug and whisk until soft peaks form.
Homemade Tomato Paste
(Makes enough for all canapés listed)- 400g Tinned Tomatoes
-plus swill water - 1/4 can - Olive Oil
- About 100ml of red wine
- 1 Onion, finely chopped
- 1 Garlic Clove, crushed
- 1 Carrot, finely ch
- Gently fry the onion and garlic until softened.
- Add the wine and bubble away for a few minutes and add the tomatoes with a 1/4 can water to swill out the can. Bring to the boil and simmer moderately partially covered until reduced by half.
- Blend roughly to thicken the sauce. I used this one batch for my mini pizzas, palmier and scone filling.
(Makes lots)

- One block Puff Pastry (500g)
- Sundried Tomato Paste or Homemade Tomato Paste (as above)
- A few Basil Leaves, shredded
- 50g Soft Goats Cheese, crumbled
- A few Black Olives, finely chopped
- 100g Mature Cheddar Cheese, finely grated
- Salt and Pepper

Left to right: Unbaked, puffing up in the oven to the finished palmier
- Cut the pastry block into 4 lengthwise so you end up with 4 long thin strips.
- Roll out each separately on a lightly floured surface until about 3mm thick - try to roll so that the rectangle shape is maintained.
- Spread two of the rolled out sheets thinly with tomato paste, sprinkle thinly with a mix of olives, basil and goats cheese. On the other two sheets, spread moderately with grated cheese, salt and pepper. Maybe add some very finely chopped onion, chives or shallots.
- Roll lengthways from both ends so they meet in the middle and fold over each other. Roll lightly into shape and chill for 5 minutes in the freezer, wrapped in cling film.
- Slice just less than 1cm thick and lay out on a non-stick baking tray. Reshape if necessary by pulling apart the rolled bits a bit and pinching the fold lightly to form a heart.
- Bake in a pre-heated oven GM7/220C/430F for about 20-25minutes until golden.
- Cool on a cooling wrack and pack into airtight tins. These can be re-heated before serving by giving them 5 minutes in a hot oven (at least GM6/200C/400F)
(Makes lots)

Scones:
- 175g Self-Raising Flour
- Salt and Pepper
- 25g Butter
- 1 Med Egg, beaten
- About 30ml/2 Tbsp milk
- Handful of Chives, chopped
- 1-2 tsp Wholegrain Mustard
- 75g Mature Cheddar Cheese
- About 4 Tbsp Tomato Paste
- About 50g Full-fat Cream cheese
- Chives or Shallots, finely chopped
- Pre-heat the oven to GM 7/220C/425F and grease a baking tray.
- Mix together the flour, salt and pepper then rub in the butter. Reserve a handful of cheese for the topping and stir in the rest along with the chives.
- Add the egg and enough milk to make a soft dough. Roll out to about 1.5cm/0.5" thick and use mini cutters about 1-1.5cm/0.4-0.5" diameter to cut out as many shapes as possible and place evenly on the baking tray. These will not spread much so you can happily put lots on, just make sure there's a bit of a gap between each.
- Brush the tops with milk then sprinkle with cheese and bake for 8-10 minutes until risen and golden.
- Leave to cool then cut in half. Spread one side thinly with tomato paste, the other with cream cheese. Sprinkle some shallots or chives on and sandwich together.
Mini Wholemeal Pizzas
(Makes 15-16)Pizza Dough:
- 100g Plain flour
- 100g Wholemeal flour
- 1tsp/7g Yeast
- 125ml Warm water
- Homemade Tomato Paste or tomato purée
- Spinach, sliced thinly
- Cheddar Cheese, finely grated
- About 8-10 Black olives, finely chopped
- 1-2 Shallots, finely chopped
- For the dough: Mix the yeast and water together, combine all the dry ingredients together and pour in the yeast mix and mix to make a dough.
- Transfer to a surface, lightly floured if necessary and knead until smooth - about 5 minutes
- Let the dough rest for 30 minutes and proof.
- Pre-heat oven to GM9/240C/465F.
- Divide into 15-16 balls, and flatten into discs.
- Spread with tomato then top with cheese, shallots, olives and spinach. Don't over-top or it'll go all soggy and horrible.
- Bake for 10-20 minutes until the cheese is all melted and the base look slightly golden.
Savoury Filled Profiteroles
(Makes about 30)
Ingredients:
- 60g/2.5oz Plain flour
- 50g/2oz Butter
- 150ml Cold Water
- 2 Large Eggs
- Salt and pepper
- 500ml Cream
- 100g Goats Cheese
- Pinch of salt
- Handful of chopped chives
- Ground Black Pepper
- Pre-heat oven to GM6/200C/400F.
- Melt the butter and water together as fast as possible then remove from the heat.
- Beat in the flour until a ball forms.
- Beat in the eggs gradually and continue beating until a creamy and shiny mixture results.
- Season then pipe onto two greased and dampened baking trays. Each ball should be about a teaspoon's worth of Choux pastry. Leave at least 2cm between each all - I fit about 15 per tray.
- Bake for 10 minutes then increase the oven temperature to GM7/220C/425F and bake for another 15-20 minutes until golden.
- With a pair of scissors, cut the profiteroles at the top to let steam escape and cool on a wire rack.
- Meanwhile make the filling: Mix together the goats cheese, cream and chives together. Season with salt and pepper then whisk until thick enough to pipe.
- When cool, pipe each profiterole with the cream mixture.