Showing posts with label chocolate. Show all posts

Thursday, 10 March 2011

A Perfectly Civilised Brownie

It's the weekend and I go back to my home town. An urge has been teasing my brain for a while, but cake or biscuits is not what I'm craving. They're just not chocolatey enough... Then one night I'm having a sugar-loaded conversation and I realise what I'm really craving is a soft, rich and gooey brownie.  A fun and longer than necessary trip to the supermarket with my candy loving boy and we're in the kitchen having fun throwing whatever we found into the silky mix of dark chocolate and butter. Putting the ginger marmalade and chocolate loaded mix into the oven, we waited in suspense until the timer beeped that 8 minutes was up. Yup. I did say 8. I got so carried away I failed to read my own handwriting which actually said 30 minutes. The result was a barely solid, sugary gooey puddle which we happily scooped with our fingers. So attempt one failed, and it took me a whole train journey back to Oxford and an extra day to find out why.

I've never failed so badly before so this did sting my inner baker's ego a bit, so much so I wanted a take two. I found myself in my kitchen a few days later, determined to make this recipe work.  I wanted orange and spice, and lots of chocolate.  So back to my notebook I went, reading everything through just to make sure I knew what I was doing, which is when I noticed my error. Suddenly it all made sense and I was calling myself all kinds of silly, but that's okay, I could now proceed with my experiment, confident in a higher chance of success.

Leftover Christmas mixed candied peel came out, crystallised ginger, ground ginger, an orange, extra dark chocolate... all went onto my worktop as I pondered proportions. I decided to err on the side of caution for ground ginger, but added the zest of a whole orange.  I wanted a warm spice mix, but humbled by my weekend disaster, I thought I would keep it simple for now. The result? A warm adult brownie, with bits of ginger and orange playing on the senses. Some tweaks I would consider next time is slightly less mixed peel, more ginger, some mixed spices and a shorter baking time for a softer, gooier brownie. The addition of a handful of nuts is another possibility, maybe walnuts or macadamia...

A Perfectly Civilised Brownie
(Makes about 20-24 squares)

Ingredients:
  • 50g Plain Flour
  • 100g Butter
  • 2 Eggs
  • 100g Dark Chocolate (70%)
  • 175g Granulated Sugar
  • 1 Level tsp Baking Powder
  • 25-50g Stem Ginger, chopped
  • 25-50g Mixed Peel
  • 1tsp Ground Ginger
  • Zest of 1 Orange
Method:
  1. Line a 18x28cm/17x11" tin with baking parchment and pre-heat the oven to GM4/180C/350F.
  2. Mix the ginger, mixed peel and ground ginger together and set aside.
  3. Melt the butter and chocolate together, along with the zest over a double boiler until melted. Beat the mixture until silky smooth.
  4. Remove from heat and beat in the eggs one at a time then the ginger, peel and spice mix until well combined.
  5. Pour into the prepared tin and bake for about 25-30 minutes until firm to the touch.
  6. Cool for 10 minutes and cut into squares.


Saturday, 19 February 2011

Cookies and milk go together like...

So lately I've been going through a bit of a nibbling phase, roaming around my house trying to find something to graze on, except... grazing is pretty hard to do when there's no food in the house. Two weeks ago is when I thought I needed to go food shopping, one week ago I thought I seriously need to buy food and today? I still had no food. What's a sick girl to do? Too ill to buy food, too peckish to sit at home without restlessly roaming the house, all that I found were sultanas which were kind of nibble food, porridge oats which are definitely not nibble food and a sealed block of chocolate I feel too guilty about breaking into since it was bought for baking.

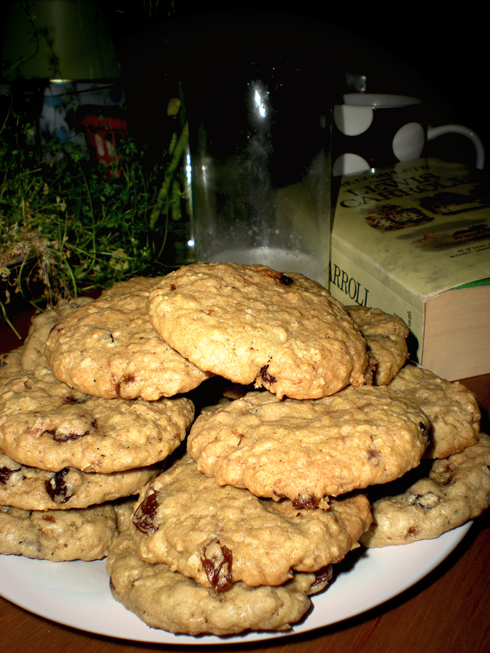
Tired though I was, baking was my only option to stop myself going mad, so I stayed in the kitchen thinking about what I could do to fix this dire situation I was in. Flapjacks were considered, but with my sore throat, I didn’t think they were going to go down too well, cakes were another option, but then again they just didn’t seem to fit the bill for once… My mind drifted to the chewy cookies I made recently and I realised I haven’t just been craving nibbles; I was craving chewy cookies! Being house bound, I wanted less sweetness and more wholesome cookies so opted to tweak the basic recipe to yield chewy oat cookies, sweetened by sultanas and chocolate chunks. The result was just what I was hoping for – a cookie full goodness, not overly sweet and satisfied my bad case of the munchies.

Chewy Fruit and Oats Cookie
(Makes 24 small)

Ingredients:
  • 150g Plain Flour
  • ¼ tsp Bicarbonate of Soda
  • 90g Butter/Margerine
  • 50g Dark Brown Muscovado Sugar
  • 100g Granulated White Sugar
  • 1 Large Egg
  • 25g Mixed Fruit/Sultanas
  • 50g Dark Chocolate, chopped
  • 100g Oats, lightly toasted (optional)
Method:
  1. Place the butter in a large pan and melt over a low heat. Meanwhile mix the flour, oats and bicarbonate of soda together well. Set the butter aside to cool slightly.
  2. Beat the sugar into the butter followed by the egg.
  3. Stir in the flour mix until well incorporated, then fold in the chocolate and fruit.
  4. Level the mixture then cover with cling film and refrigerate for at least 30 minutes.
  5. Pre-heat the oven to GM5/190C/375F
  6. Drop teaspoon sized balls onto a baking sheet (I put about 8 on a small tray well spaced) and flatten.
  7. Bake for 10-12 minutes or until the edges have just about turned golden. They'll continue to cook on the tray for 1 minute then cool on a wire rack.

Thursday, 10 February 2011

Chewy Triple Chocolate Almond Cookies

What is it about cookies and biscuits that is just so moorish?  Especially when it's not quite cheery enough to ponder outside unless absolutely necessary. One cold weekend I found my mind drifting to the kitchen; it is the natural place to drift to when the house feels empty and cold.  A rummage through the treasure trove and I have myself a promising start for a cheerful batch of cookies.  The night will be filled with dancing, but in the meantime I can bake.

I found this basic recipe on the endless resource pool that is Google in my first year of university, and now lovingly return to it with some modifications.  Scooping out chunks of cookie dough is just so satisfying, feeling the mixture stickily mould in my hands into balls of scrumptious goodness.  After affectionately flattening the discs, they spent a short time basking in the oven to come out as large discs of chewy heaven.  The house is now a warm, glowing haven filled with the sweet scent of chocolate and warm thoughts...

Chewy Triple Chocolate Almond Cookies
(Makes about 20)

Ingredients:
325g Plain Flour
1/2 tsp Bicarbonate of Soda
175g Butter/Margarine
100g Dark Muscovado Sugar
200g Granulated Sugar
1 Large Egg
1 Egg Yolk
100g Whole Almonds, chopped
50g Dark Chocolate Chips
50g White Chocolate Chunks
Method:
  1. Place the butter in a large pan and melt over a low heat. Meanwhile mix the flour and bicarbonate of soda together well.  Set the butter aside to cool slightly.
  2. Beat the sugar into the butter followed by the egg and egg yolk.
  3. Stir in the flour mix until well incorporated, then fold in the chocolate and almonds.
  4. Level the mixture then cover with cling film and refrigerate for at least 30 minutes.
  5. Pre-heat the oven to GM5/190C/375F
  6. Drop walnut sized balls onto a baking sheet (I put about 8 on a small tray well spaced) and flatten.
  7. Bake for 10-12 minutes or until the edges have just about turned golden.  They'll continue to cook on the tray for 1 minute, then cool on a wire rack.

Sunday, 19 December 2010

Savoury Canapes and a Gluten-Free Cake

A view from my bedroom

Like many others in the South of England I woke up find a surreal wonderland blinking back at me in the late morning sun. You know how when your part of the world is just blanketed with this smothering, fluffy, white sheet, how the light quality subtly changes but it takes a while to realise the cause?  I love that feeling, it's not very often one gets to experience it, all too soon the chaos of snow catches up with us and we soon wish it gone again.  Although laughed at when I first bought them, my new snow grips have proved to be a Godsend.  Unlike many I have the freedom to roam around the outdoors relatively freely, to really enjoy the snow without fear of slipping ungracefully - not to mention probably painfully on to my unsuspecting behind! With my magical shoe attachments, I was free to buy food for my house Christmas meal with pleasure, not to mention collect my missing button from a lovely elderly woman down the road who I work with.  With that I will stop going on about how much I love my shoe chains and talk about things related to my blog, that's right food.

Gluten-free Layered Chocolate Cake with Clementine and Cognac Whipped Cream

I love December, it's the season of festive eating not to mention the one time it's perfectly acceptable to pile on the pounds without comment.  So far I have had several Christmas dinners in the form of Latin-style tapas, traditional four-course vegetarian meal Exeter-College style with carol singing in-between courses, Asian buffet and two house ones in the guise of "practice" and "real".  Other things I get excited about this season are the carol services by candlelight and festive craft evenings where delectable canapés are served around talented women.  This year I failed to make an appearance due to going on a last minute dancing weekender which was fantastic, but not before leaving my canapé contributions for the church.  Last year I went for tomato and basil puff pastry stars but this year I went for slightly more daring and chose: savoury filled mini palmier, goats cheese filled profiteroles and mini cheese and tomato filled scones (Recipe below).  My house mate and I were just discussing how at first sweet things are gushed about but without fail, the savoury (unless they're boring dry sandwiches) bites will always go first, why is that?

My Canapé selection for the Craft Evening

I had great fun making the canapés, especially the palmier which were easier to do than I imagined.  They will definitely be made again.  The Profiteroles as you can see from the photos are unfilled, and I don't recommend filling them until they're ready to be served as they then can't be re-crisped in the oven.  Upon saying that though I tried one (or five) filled after a day and although not crispy they still had a wonderful taste and texture, they're just that bit nicer straight out the oven.  With that I leave you with a handful of canapé recipes, and a cake recipe which is coeliac friendly that I made for our "real" house Christmas dinner.

Layered Chocolate Cake
(Serves 10)

Ingredients:
Cake:
  • 250g Dark Chocolate (around 70%)
  • 190g Butter/Margerine
  • 3Tbsp Rum
  • 125g Ground Hazelnuts/Almonds
  •  - Flour can be used if not required to be gluten-free
  • 5 eggs
  • 190g Granulated Sugar
  • 1tsp Baking Powder
  • 4-6Tbsp Apricot Conserve
  • Icing to dust
Cream:
  • 300ml Double Cream
  • Zest and Juice of 1-2 Clementines
  • 1Tbsp Brandy
Method:
  1. Pre-heat the oven to GM3/160C/325F and line a swiss roll/baking tin
  2. Over a double-boiler, melt the chocolate and butter together gently, stirring until smooth and glossy.  Remove from heat and stir in the alcohol if using.
  3. Meanwhile, whisk eggs and sugar together until the mixture thickens and falls in thick ribbons rather than a thin stream.
  4. Gently fold in chocolate mixture until no streaks remain and repeat with the flour.
  5. Pour into the tin and level, then drop carefully from a height of about 10-15cm to remove large air bubbles and bake for 20-30 minutes until a skewer comes out with a few crumbs on. Leave in the tin to cool for 5 minutes.
  6. On a cooling wrack, place a liberally pierced baking paper to line it and transfer the cake onto it to cool completely.  Score across the long part of the cake to divide it into three equally.  
  7. Once cool, cut one slice and transfer to serving dish/board. Beat the apricot to loosen and spread liberally across the sponge.  Top with a second piece of cake and repeat with the jam and top with the final piece.  Trim the ends to neaten and dust with icing sugar and Clementine zest.
  8. Cream: To make the cream, pour everything into a jug and whisk until soft peaks form.

    Homemade Tomato Paste
    (Makes enough for all canapés listed)

    Ingredients:
    • 400g Tinned Tomatoes
       -plus swill water - 1/4 can
    • Olive Oil
    • About 100ml of red wine
    • 1 Onion, finely chopped
    • 1 Garlic Clove, crushed
    • 1 Carrot, finely ch
    Method:
    1. Gently fry the onion and garlic until softened.
    2. Add the wine and bubble away for a few minutes and add the tomatoes with a 1/4 can water to swill out the can. Bring to the boil and simmer moderately partially covered until reduced by half.
    3. Blend roughly to thicken the sauce.  I used this one batch for my mini pizzas, palmier and scone filling.

      Savoury Palmier
      (Makes lots)

      Ingredients:
      • One block Puff Pastry (500g)
      • Sundried Tomato Paste or Homemade Tomato Paste (as above)
      • A few Basil Leaves, shredded
      • 50g Soft Goats Cheese, crumbled
      • A few Black Olives, finely chopped
      • 100g Mature Cheddar Cheese, finely grated
      •  Salt and Pepper
      Method:
      Left to right: Unbaked, puffing up in the oven to the finished palmier
      1. Cut the pastry block into 4 lengthwise so you end up with 4 long thin strips.
      2. Roll out each separately on a lightly floured surface until about 3mm thick - try to roll so that the rectangle shape is maintained.
      3. Spread two of the rolled out sheets thinly with tomato paste, sprinkle thinly with a mix of olives, basil and goats cheese. On the other two sheets, spread moderately with grated cheese, salt and pepper.  Maybe add some very finely chopped onion, chives or shallots. 
      4. Roll lengthways from both ends so they meet in the middle and fold over each other.  Roll lightly into shape and chill for 5 minutes in the freezer, wrapped in cling film. 
      5. Slice just less than 1cm thick and lay out on a non-stick baking tray. Reshape if necessary by pulling apart the rolled bits a bit and pinching the fold lightly to form a heart.
      6. Bake in a pre-heated oven GM7/220C/430F for about 20-25minutes until golden.
      7. Cool on a cooling wrack and pack into airtight tins.  These can be re-heated before serving by giving them 5 minutes in a hot oven (at least GM6/200C/400F)

        Mini Star Cheese, Chive and Mustard Scones
        (Makes lots)
        Ingredients:
        Scones:
        • 175g Self-Raising Flour
        • Salt and Pepper
        • 25g Butter
        • 1 Med Egg, beaten
        • About 30ml/2 Tbsp milk 
        • Handful of Chives, chopped
        • 1-2 tsp Wholegrain Mustard
        • 75g Mature Cheddar Cheese
        Filling:
        • About 4 Tbsp Tomato Paste
        • About 50g Full-fat Cream cheese
        • Chives or Shallots, finely chopped
        Method:
        1. Pre-heat the oven to GM 7/220C/425F and grease a baking tray.
        2. Mix together the flour, salt and pepper then rub in the butter.  Reserve a handful of cheese for the topping and stir in the rest along with the chives.
        3. Add the egg and enough milk to make a soft dough.  Roll out to about 1.5cm/0.5" thick and use mini cutters about 1-1.5cm/0.4-0.5" diameter to cut out as many shapes as possible and place evenly on the baking tray.  These will not spread much so you can happily put lots on, just make sure there's a bit of a gap between each.
        4. Brush the tops with milk then sprinkle with cheese and bake for 8-10 minutes until risen and golden.
        5. Leave to cool then cut in half. Spread one side thinly with tomato paste, the other with cream cheese.  Sprinkle some shallots or chives on and sandwich together. 

          Mini Wholemeal Pizzas
          (Makes 15-16)

          Pizza Dough:
          • 100g Plain flour
          • 100g Wholemeal flour
          • 1tsp/7g Yeast
          • 125ml Warm water
          • Homemade Tomato Paste or tomato purée
          • Spinach, sliced thinly
          • Cheddar Cheese, finely grated
          • About 8-10 Black olives, finely chopped
          • 1-2 Shallots, finely chopped
          Method:

            1. For the dough: Mix the yeast and water together, combine all the dry ingredients together and pour in the yeast mix and mix to make a dough. 
            2. Transfer to a surface, lightly floured if necessary and knead until smooth - about 5 minutes
            3. Let the dough rest for 30 minutes and proof.
            4. Pre-heat oven to GM9/240C/465F. 
            5. Divide into 15-16 balls, and flatten into discs.
            6. Spread with tomato then top with cheese, shallots, olives and spinach.  Don't over-top or it'll go all soggy and horrible.
            7. Bake for 10-20 minutes until the cheese is all melted and the base look slightly golden.
             
              Savoury Filled Profiteroles
              (Makes about 30)

              Ingredients:
              • 60g/2.5oz Plain flour
              • 50g/2oz Butter
              • 150ml Cold Water
              • 2 Large Eggs
              • Salt and pepper
              Filling:
              • 500ml Cream
              • 100g Goats Cheese
              • Pinch of salt
              • Handful of chopped chives
              • Ground Black Pepper
              Method:
              1. Pre-heat oven to GM6/200C/400F.
              2. Melt the butter and water together as fast as possible then remove from the heat.
              3. Beat in the flour until a ball forms.
              4. Beat in the eggs gradually and continue beating until a creamy and shiny mixture results.
              5. Season then pipe onto two greased and dampened baking trays.  Each ball should be about a teaspoon's worth of Choux pastry.  Leave at least 2cm between each all - I fit about 15 per tray.
              6. Bake for 10 minutes then increase the oven temperature to GM7/220C/425F and bake for another 15-20 minutes until golden.
              7. With a pair of scissors, cut the profiteroles at the top to let steam escape and cool on a wire rack.
              8. Meanwhile make the filling: Mix together the goats cheese, cream and chives together.  Season with salt and pepper then whisk until thick enough to pipe.
              9. When cool, pipe each profiterole with the cream mixture.  

              Wednesday, 18 August 2010

              Mmmm, cupcakes

              Wow, it really feels like it's been a while since I updated this blog.  On the bright side though, it must mean I am actually becoming busier and my blog addiction is subsiding somewhat... but on second thoughts, I'm completely happy to be blogging again so maybe it hasn't subsided that much!  Over the last week, it seems as if I have been baking every day in one form or another.  Gingerbread men were cut, cupcakes for picnics and birthdays were whipped up, shortbread ducks and stars were created and a frugal hotpot made from the contents of my magical fridge which still does not look as if it is emptying any time soon.


              I have not been the most organised of humans this week, so I thought it would be safer to stay indoors as much as possible to minimise being a danger to myself.  I felt it was going to be one of these weeks.  So far I had managed to mistake a friend coming over on Monday when it was actually Tuesday,  triple-booked myself on said Tuesday, having to reveal my embarrassing blunder to get myself out of two appointments and proceeding to cook an awful lunch for a friend who I was meant to have met Tuesday but postponed until Wednesday...  And today I had an enjoyable walk into town (so far so good...) to the Gloucester Green food market with my friend.   This was my first trek to the market in what feels like months (and it probably was) and I was greeted by a beautifully colourful sight.  Casually sitting on the tables were summer squashes, and other modest vegetables but the fruit stand was a glory to look at: mounds of rosy cheeked apricots, succulent plums, peaches and nectarines, towering punnets of cheap cherries, raspberries and blueberries.  I was also excited to see raw beetroot, which I was inspired to give a go by Designer from our weekend together.  Whilst queueing,  I managed to lose a £2 coin which was upsetting and hit by a sudden downpour of water which has somehow collected in the tent top.  I was rather fuddled by this as I had not realised it had rained today, but it was still sunny when we left the market, so we had time for tea in a Coffee Republic and proceeded to miss the dry spell and got poured on as we ran to Waterstones for shelter.  Quite a feat considering I was lugging an impressively heavy food laden backpack and my friend a bag of delicate soft fruits!  A leisurely read of the River Cottage Preserves Handbook later and a tentative glance outside the second storey window, and we were ready to brave the walk back home which promptly led to a blister forming which became ripped and painful, successfully rendering myself incapable of dancing tonight.  Every cloud has a silver lining though, we ended up curling up to watch Singing in the Rain instead which I had forgotten how much I had loved.  So it looks like my week of bad luck hasn't run dry yet, let's hope tomorrow will be better!

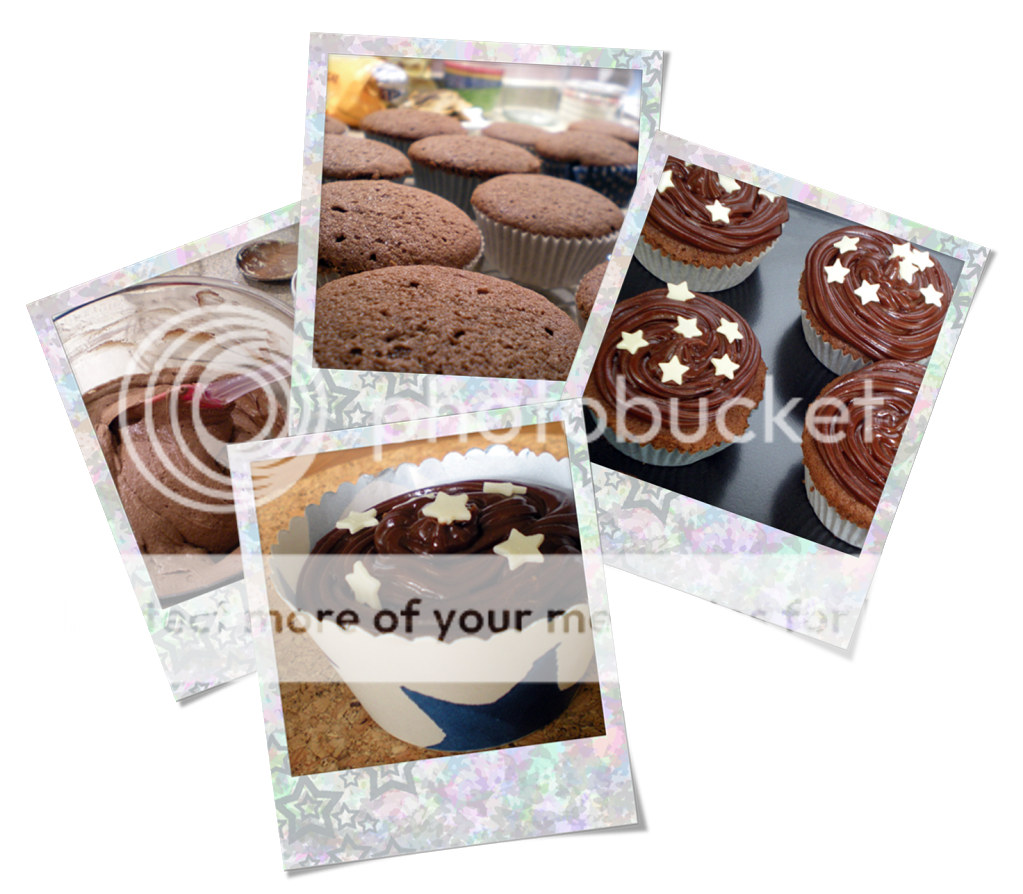
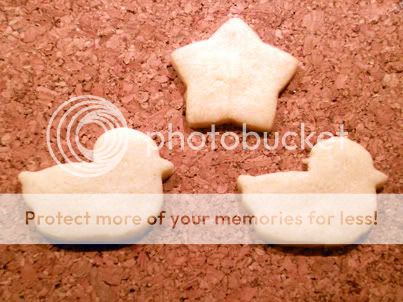
              I do like to digress, but back on topic, below are two recipes for mocha cupcakes and shortbread.  I missed my friend's birthday over the month of July due to caring for my mum so I made him a very belated mocha cupcake and mini duckie shortbread instead.  The Shortbread recipe was based on a Delia Smith Recipe which can be found on her website - I just replaced the cornmeal with rice flour as I found cornmeal weirdly chewy the last time I used it.  I love all kinds of shortbread but my favourite are the thin and crispy ones which make me feel more saintly until I realise I have just eaten the whole batch.  The mocha cupcakes I kind of made up on the spot using basic cupcake knowledge.  I wanted to use coffee, so increased the flour to 125g from 100g, but added the standard 25g cocoa.  I used about 2 Tablespoons of hot coffee in the end, so wasn't quite sure how they were going to turn out!  After a 15 minute wait of suspense, the cupcakes came out wonderfully moist and soft.  I really recommend them if you're a coffee lover. With that I leave you and hopefully I'll make it to update again soon still in one piece!

              Mocha-Choca Cupcakes
              (Makes 16-18)

              Ingredients:
              • 100g Margarine
              • 125g Self-raising flour
              • 25g Cocoa
              • 2Tbsp Very Strong coffee
                 - I made mine with 3tsp coffee granules in 4Tbsp hot water
              • 2 Eggs
              • 45g Dark eating chocolate 
              • 15g Butter
              • 80g Icing sugar
              Method:
              1. Pre-heat the oven to gas mark 4/180C/350F Cream the margarine and sugar together until light and fluffy
              2. Gradually whisk in the eggs
              3. Carefully and gradually whisk in the coffee - don't worry if it curdles a bit - just add some flour
              4. Mix together the flour and cocoa, then fold into the mixture until just incorporated
              5. Spoon teaspoon mixtures into cupcake cases until 3/4 full
              6. Bake for 15-20 minutes until risen and the sponge bounces back when lightly pressed.
              7. Leave to cool and make the chocolate icing
              8. Melt the butter and chocolate together over a double boiler or carefully in the microwave.
              9. Stir in the icing sugar and add enough coffee (preferably hot) to make the icing either spreadable or piping consistency.
              10. Pipe or spread onto the cool cakes and leave to set.  Before it sets, I added some white chocolate stars to the frosting.   
              NB: With the chocolate icing, I only made enough for about nine of my cakes as I: i) prefer some un-iced and ii) only wanted to ice a few for my friend's birthday presentation.  Just double the recipe (chocolate, icing and butter) to cover all the cakes.  If you are spreading, you'll probably have enough with just the half recipe.  I use cheap dark chocolate for this as I still get a glossy frosting and the sugar content works better than expensive dark chocolate which tend to be more bitter.

              Shortbread Thins
              (Makes about 2 trays worth)


              Ingredients:
              • 40g Rice Flour
              • 75g Plain Flour
              • 40g Caster sugar
              • 75g Margarine or Butter
                  - I used half of margarine and butter
              Method:
              1. Pre-heat Oven to gas mark 2/150C/300F
              2. Cream the butter and sugar together until light
              3. Add the flour and rice flour, mixing to form crumbs.  Push the mixture together with the wooden spoon or your hands until it resembles a crumbly ball of dough.  
              4. Roll out thinly - about 3mm and cut out shapes with a cutter
              5. Place on a non-stick/greased baking sheet and bake for 15-20 minutes until just golden.

              Monday, 9 August 2010

              A Weekend in Bridgwater

              Vegan cupcake with raspberry butter cream frosting
              Last weekend I visited Designer in her home town near Bristol.  The train journey up was surprisingly smooth, but alas I can not say the same about the journey back due to a mix of badly labelled and positioned trains and confusion over stations, which led to mad bolting towards unknown platforms and hopping on random trains.  I know. Mad. Returning to Oxford only half an hour later than expected though was acceptable to me and overall the weekend was a wonderfully packed one full of baking, eating, baking, drinking, baking, make-over, films and fruit picking.  Did I mention baking?  What more can one ask for?

              Beetroot Risotto with crème Fraîche and dill
              Arriving late Friday evening, we settled down to a beautiful beetroot risotto made by Designer, which was a stunning characteristic blush red.  Washing it all down with a small glass of Rhône, I can happily concede the weekend had well and truly started.  We had a lazy start the next day, watching Saturday morning cook shows on the TV whilst it showered in the grey outdoors.  I had to admit I was hoping for a sunny day - but I speak too soon.  As we were leaving to go find a Pick Your Own (PYO) Farm, the sun blazed out and burned the remaining clouds away, leaving us to a beautifully bright and mild day with a playful wind teasing us.  After getting slightly lost down a maze of brambles-lined country road, a friendly local redirected us to the PYO, which turned out to be closing the very next day due to reaching the end of their season.  Determined, we trundled down the extensive farm looking for raspberries and gooseberries and found both.  A fun, albeit slightly prickly session later, we left with a punnet of white and black gooseberries and sinfully sweet raspberries, basking in the sun with a farm-made ice cream.  A short drive later and we found ourselves walking down beside the locks, gazing at the canals, blackberry bushes and sloe berries.  It was too early to pick anything yet so no foraging, but the delicate purple blackberry flowers were a delight to look at nonetheless.  We enjoyed the last of the sun for the day sitting outdoors enjoying a traditional cream tea whilst watching a wasp trying to engulf a jam splodge.  Quite amusing really!  Supper that night was a lovely simple dish of smoked salmon, prawns and lemon spaghetti dish in a crème Fraîche sauce, this time accompanied by a Rose Pinot Grigio.
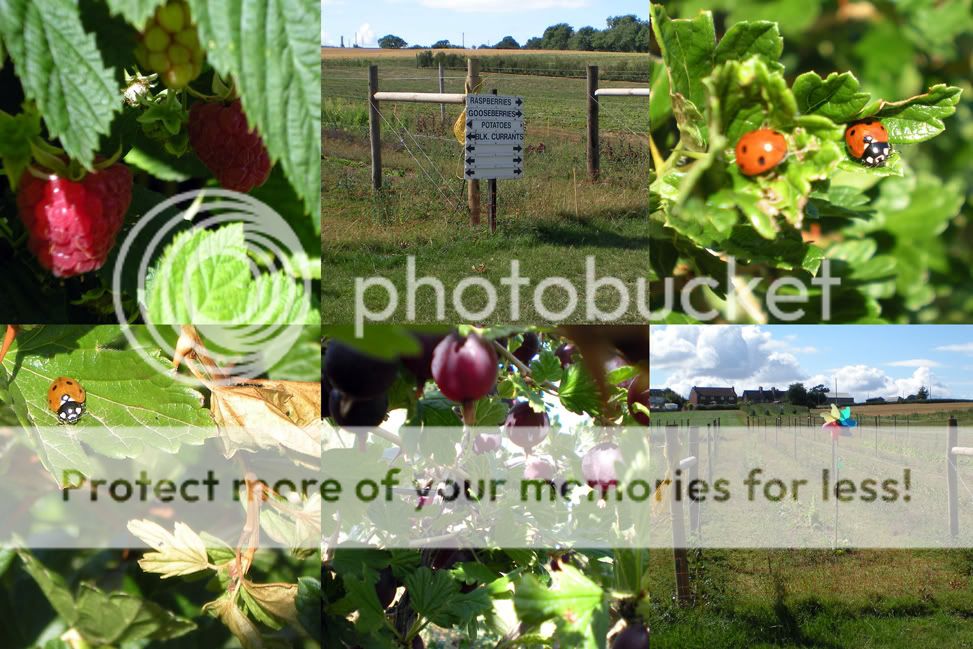
              PYO Farm showing raspberries and black gooseberries
              As evening approached, we perused gingerbread recipes and finally alighted onto one found the in the Hummingbird Bakery Book.  Instead of using the specified list of spices though, we substituted the equivalent amount in gingerbread mix, lovingly made up by Designer's mum.  The smell was divine, and we hadn't even baked them yet.  Patiently we tucked the dough into the fridge to allow the flavours to develop over-night as we turned to making grilled pepper salsa which tasted heavenly with toasted pitta strips and tortilla chips, which we happily munched with Pinot Grigio and watching Disney's Beauty and the Beast.  Tonight was finished with a rich chocolate mousse hiding brandy-soaked black cherries in the bottom, with delicate almond macaroons we made earlier along with the mousse.

               Cream Tea by the Locks

              Sunday morning was a relaxed affair, once again watching addictive cookery shows and sipping tea.  Eventually we naturally migrated to the kitchen to start some much anticipated baking.  Upon commenting on the sadly steep continual rise on dairy products, especially butter, we settled for vegan chocolate cupcakes adapted also from the Hummingbird bakery with the intent of decorating them in butter cream later.  The mixture resembled a stiff chocolate paste, resembling more brownie than chocolate cupcake, but in the oven it went with the two of us each believing it would not rise due to how heavy it looked.  In the meantime though, we had fun rolling out the gingerbread dough and making little boys and girls.  A check on the cupcakes and to our delight, the mixture had ballooned and we had cute round cupcakes waiting to come out, trading their oven space with the gingerbread people.  We watched part of Gigi, one of my all time favourite musicals before realising that time really wasn't on our side.  Off to the kitchen we ambled to get started on decorating.  A hilarious session later, we finally had icing the right consistency to pipe: white glace for the gingerbread people and a raspberry tinted butter cream for the cupcakes.  With the kitchen a tip, although filled with lovely aromas and baked treats, I realised I was about to miss my train if we didn't leave pronto.  A fast pack-up later (in which time, Designer had thoughtfully layered some gingerbread friends into a box for me) we were out the door speeding towards the station which mercifully was a short distance away.  With the arrival of the train, our weekend together came to an end, and we said our farewells.  I was about to embark on a complicated journey home, on a mission to reach my church service on time; Designer was headed back to her now "slightly" chaotic kitchen and I had gingerbread friends to keep me smiling all the way home.

               Gingerbread Making Fun

              Saturday, 24 July 2010

              A slice for you and I

              I decided to stay home today to accompany my mum who's still recovering post-surgery.  We spent the day shredding my private documents which had accumulated over the space of a few years and oh my goodness; we filled two bin bags and that was excluding blank envelopes, leaflets, catalogues, etc... I have to say though, looking at my room you still can not tell I have just removed two bin bags worth of junk from it.  Once we had dumped the contents into the recycling bin, I decided it was time for tea.  A tea break sounded amazing, but tea with cake sounds even better so off to the kitchen I trundled with subtle positive encouragement from mother dearest.  Once there though, I had problems thinking of a cake to make - you see, recently my sister has been on a bit of a diet and I've noticed that my eating habits have not been much better so I wanted to opt for a healthier cake.  I thought of a swiss roll but I really dislike the ones with nothing fresh in them, and I really didn't want to walk to the shops, so I pondered some more... Wouldn't a chocolate cake be amazing with a cherry filling? Mmmm, now there's an idea, maybe a fat free chocolate sponge? That should work!  A brief rumage through my baking draw and out came all the ingredients needed for a chocolate sponge, I'm doing well today it seems. 

              Amazingly, the mixture doubled in bulk in the oven and didn't collapse

              Normally when I'm home with my parents, my mum, sister and I go to town and take a tea break whilst there.  This usually consists of the mentioned tea and a naughty slice of cake, but since my mama's surgery going to town hasn't been possible, but she's getting stronger everyday so hopefully we'll resume our trips together soon.  In the meantime though tea is taken at home which suits me just as much as it gives me an excuse to get messy in the kitchen.

              Morello Cherry Conserve

              I do not bake sponges often, but I can confirm that beating eggs with a whisk until tripled in bulk is possible by hand, it's just slightly quicker with an electrical whisk.  I can happily admit I am a sloth at heart, therefore I use a hand blender with a whisk attachement.  I must say though, if you have time on your hands, it's quite satisfying seeing this eggy gloop turn into a beautiful fluffy mass and doing it by hand in my opinion gives it a glossier appearance.  Today is the first time I tried the whisking over a double boiler over a low heat- this is simply a small pan of some gently simmering water with a bowl over the top with the sugar and egg mixture in, gently warming the mixture without burning or scorching it - in this case scrambling it.

              So far so good, cherry conserve on one side and buttercream on the other

              The scent of chocolate permeating the air is something a cafe can't recreate and moments like this I do cherish.  Mama was right when she said nothing can beat homemade cakes, or homemade anything come to that.  It's not just the taste and texture, it's the whole experience from thinking about what to make to serving your finished creation.  Teatime is just so much more satusfying with homemade goodies- not that I object to the occasional teatime out, some cafes have their own little charm- just look at the Art House Cafe

              Viola!
              I am happy to say that the cake turned out almost perfectly, ignoring the slight incident with the cake refusing to let go of the cooling rack (aka my masquerading grill rack).  After much teasing and coddling, they let go and continued their journey to become one.  At this point, I would love to acknowledge the miraculous ability of icing sugar to hide scars and holes - icing sugar, I commend you.  I would also like to take this opportunity to praise the morello cherry conserve - it was sweet but not overly so with a tart kick which went wonderfully with the chocolate sponge.  Whilst the cake was cooling, I decided coffee was better suitor with chocolate and cherry so out came the cafetiere, and about an hour after my first thought of a tea break popped up, cake and coffee was served.  My verdict? Scrummy and guilt-free as no butter went into the sponge, just a smidgen in the buttercream.  Mum's verdict? She wanted seconds!

              That didn't last long...

              Chocolate Sponge Cake
              (Serves 8)

              Ingredients:
              • 100g Self-raising flour
              • 25g Cocoa
              • 4 Large eggs
              • 125g Caster sugar
              • 85g Icing sugar plus extra to dust
              • 40g Butter
              • 1tsp Milk approx.
              • 2-3Tbsp Cherry (Morello) Conserve
              Method:
              1. Grease and line the base of two deep sandwich tins (around 20cm) then preheat the oven to Gas Mark 4/180C/350F.
              2. Set a pan of water (about 2cm deep) to a gentle simmer and place a bowl over the top, keeping the heat very low.  Meanwhile, mix the flour and cocoa together until well combined.
              3. Add the egg and sugar together in the bowl and whisk until tripled in bulk and thick enough that a trail is left behind when the whisk is lifted.
              4. Remove from  the heat, and continue to whisk until cool, about 2 minutes.
              5. Fold in the flour and cocoa, divide between the tins and bake in the oven for 25-30 minutes.  The sponge should spring back when lightly pressed and be beginning to shrink away from the sides.
              6. Turn the cakes out to cool and make the buttercream by beating the butter until soft then gradually beating in the icing sugar, thin with some milk and continue beating until all the icing sugar is gone and a smooth buttercream appears. 
              7. Before spreading the conserve, give it a stir to loosen it up and spread on one of the sponges then spread the buttercream on the other sponge.  Sandwich the two together then dust with icing.  Don't worry if the sponge appears to be stuck to the rack, coddle it a bit and it will come off intact - if it doesn't icing sugar is a beautiful thing - the cakes's equivalent to concealer.
              Not long at all!

              Scrap Busting the Matryoshka Way

              I got gifted this doll pattern from Bee Sew Inspired and it's been on my want to make list since it came out. Initially I had a fleet of...