Showing posts with label picnic. Show all posts

Sunday, 7 August 2011

Barcelona and Rosehips

Rosehips are weird. I never know if I like them or not, and from all I heard and read it was always too risky to pick myself. Under ripe and apparently the seeds have dangerous or unpleasant effects on your throat and digestive tract, over ripe and it's hard to prepare them.  I always avoided rosehips until recently when just a couple of days before my summer holiday to Barcelona my fiancée's mum gave a good bagful of the cheery red baubles. I won't lie, although I recognised them, I was at a complete loss as to what to do with them. Eaten alone (seeds and all), they tasted okay, kind of earthy with a twinge or what might be called sweet or berry like. Standing in my kicthen after a brief search through the web to see what I could do with them in a short space of time, I found a recipe for a quickbread and candied rosehips, both of which were delicious. The quickbread is citrusy and sweet, coupled with the fun crunch of poppy seeds. As can be seen, it goes perfectly with a good mug of tea.

Once again I felt let down by Spain. This time I went with my then boyfriend, and now amazing fiancée. We landed in Catalan and endured a brown and withered landscape drive to Barcelona where to my dismay at least we found the place not brightly coloured and vibrant with life as expected, but more overcrowded with slum-like dusty houses - one of which was our apartment for our stay. Within four days I had been robbed twice and totally dependent on my other half but despite that it wasn't all bad.

The whole holiday was wonderful in so many ways, and we saw some breathtaking works of art. Gaudi's Cathedral Basílica i Temple Expiatori de la Sagrada Família was one of the highlights of our trip. As we stood in the main worship hall gazing around at the glory engulfing us, it felt like I had found a place so permeated with God, we spent most of the visit in awed silence, walking around wondering how one man managed to not just think up this grand design but also get a plan together enough to make it reality. The city was quite fun too in hindsight, we found an amazing little fondue restaurant called La Carassa tucked away in an alley with low lighting, embroidered drapes around the place with friendly and humorous waiters. We had an amazing fondue with crayfish and rustic bread; the night ending with a red carnation as we left the cosy nest to tipsily trundle through the night life of Barcelona.

Our flight home was uncomplicated and as we landed back in England, I heaved an internal sigh and I don't know about you but to me, it's good to be back home.

Rosehip Quickbread
(makes a 2Ib loaf)


Ingredients:
  • 4-5 Clementines, peeled and puréed plus water to make up to 1C/240ml
  • 0.5C/120ml Dried mixed fruit
  • 0.75C/180ml Rose hips, seeded and chopped
  •  2Tbsp/30ml Butter, melted
  • 1 Egg, beaten
  • 1-1.5C/360ml Plain flour
  • Scant 1C/200g Sugar
  • 1tsp/5ml Baking Powder
  • 0.5tsp/2.5ml Bicarbonate of Soda
  • 0.5C/100g Mixed nuts and/or seeds
    • I used 1Tbsp of Linseed, 1Tbsp Wheatgerm and 2Tbsp Poppy seeds
Method:
  1. In a large bowl, mix together: orange juice, mixed fruit, rose hips, butter and egg.
  2. Sift together dry ingredients: flour, baking powder, bicarbonate of soda, and sugar.
  3. Add Dry mix to wet mix and stir until just combined. Fold in the seeds gently.
  4. Spoon the mixture into a greased loaf tin (8" x 5"/20cm x 12cm) with a lined base and bake in a pre-heated oven at 350F/175C/GM3.5 for about an hour.

Thursday, 26 May 2011

Oaty Apple Cookies

I feel I should start this entry with a fat apology. I think it’s safe to say I’ve hit my first blogger’s block, although it’s not just the writing but the cooking too. Recently I’ve started a new job alongside my current one, which means I have practically no time to indulge in adventurous cooking or baking. A few days ago though I was reading a new entry by the Traveller’s Lunchbox blog and noticed a tempting cookie recipe. I thought about how much work I had to do and sadly left it alone. Last night however, after getting home from my second job, I decided I didn’t want to go back to work yet again and so began a soothing session in the kitchen. Tiredly I roamed around gathering bowls, spoons and scales, but as I laid my equipment out, a happy serenity floated over me. Tired I might be, but I’ve really missed baking; the weighing out of raw ingredients, the relaxed combining of everything into luxurious dough, filling the kitchen with a deliciously sweet aroma. How can one feel down with the scent of warm cinnamon and apples permeating through all the rooms of the house?

Thank you Miss Designer for seeing how I am and reminding me of my neglect of my poor blog. Hopefully as I adjust to new work hours, I will make time for more cooking and baking sessions, because like baking I’ve missed writing on my blog too!

Below is a cookie recipe adapted from and inspired by a recipe shared by the Traveller’s Lunchbox.  I decided to go for a fruitier option with oats instead of chocolate. After Easter, I find the joys of chocolate have left me somewhat and I welcome treats which omit it completely.

Soft Cinnamon, Oats and Apple Cookies
(Makes 8 large cookies)

Ingredients:
  • 5.5oz/160g Plain flour
  • ½ tsp Baking powder
  • ¼ tsp Bicarbonate of soda
  • 1 large Egg
  • 4oz/100g Butter, melted
  • 2.5oz/75g Brown Sugar
  • 2.5oz/75g Granulated sugar
  • 1 Tbsp (15ml) vegetable oil
  • 1oz/25g Porridge oats
  • 1oz/25g Mixed Fruit
  • 1 Apple, cubed (5mm) – about 4.5oz/125g prepared weight

Method:
  1. Preheat Oven to GM6/200C/400F
  2. Coat the apples in 1Tbsp of the white sugar and place in the oven to dry out for about 15-20 minutes – checking occasionally.
  3. Mix together the flour, oats, baking powder and bicarbonate of soda and set aside.
  4. Add to the melted butter the oil and mix well. Add the sugar and eggs and whisk until smooth.
  5. Fold in the flour mixture until evenly mixed then add the mixed fruit and apples and mix until evenly distributed. 
  6. Chill the mixture for 5-10 minutes until firm enough to roll into 8 golf ball sized pieces, then put on a tray and freeze for at least 30 minutes.
  7. Preheat the oven to GM6/200C/400F and lay about 4 balls of dough to a tray, spaced at least 5cm/2inches apart. Bake for 10 minutes then reduce the oven temperature to GM3/160C/325F and bake a further 10-15 minutes until the edges are golden. Switch the oven off and leave the cookies to cool on the sheet before moving to a wire rack. I left my cookies to set in the oven for about 5 minutes before removing to cool completely.

Saturday, 2 April 2011

How about a cake missing its main three elements?

Is anyone else loving the smell and sight of spring? I walked through an abandoned apple orchard today and as I entered the narrow gap, startled a young doe.  Blossoms were beginning to erupt but it will be several weeks yet before the whole orchard comes into bloom.  Walking down a path lined with pink blossom trees, I remembered the day a funnel of petals were gracefully swirling around me as I cycled to work. It is times like that where I realise and appreciate not just how breathtakingly splendid creation is, but also how transient. Walking down the same path today, the trees are still pink but missing most of their delicate blooms, which were instead adorning the green grass below.

Sitting here still giddy from the sun, I want to share with you yet another gluten free recipe. SPLAT! duty was last week, with the additional request, that not only that these should be gluten and dairy free but now also egg free. So the main components of a cake is basically, dairy (butter), wheat (flour) and eggs.  What happens when all three elements are removed? Some trawling through websites later and I found a perfect recipe on a food forum found here. I am a bit against gluten free flour although must admit it is good in a pinch, but they cost so much I've taken to making up my own mix.  I tend to use 1 part gram flour to 3 parts rice flour. I suspect fine cornmeal (polenta) can be used in place of rice flour too as that is cheaper still! When I get round to trying it, I will report back. Basically I find gram flour adds structure to a cake and acts in many ways as flour does. Its only downfall is its pungent taste when used in too high a proportion and undercooked; blend it with neutral flours though and it acts as a cheap alternative to gluten free flour.

Wandering down South Park today, we encountered a bright red ice cream van. One Mr. Whippy ice cream later, I happily stroll home, with the sun warming my hair celebrating the promise of more such days to come .  Below is my adaptation of the recipe provided in the link above.

Pear Cupcakes
(Makes 12)

Ingredients:
  • 25g/1oz Gram Flour
  • 75g/3oz Rice Flour
  • 1tsp Baking Powder
  • 0.5tsp Bicarbonate of Soda
  • 50g/2oz Brown Sugar
  • 1 Ripe Pear, grated
  • 2Tbsp Golden Syrup
  • 4Tbsp Sunflower Oil

Method:
  1. Pre-heat the oven to GM5/190C/375F
  2. Sift the dry ingredients (minus sugar) into a bowl to remove lumps, stir in the sugar and mix to combine.
  3. Finely grate the pear directly into the bowl, discarding the resultant lump of skin and pips and mix until well combined.
  4. Pour 1Tbsp of oil oil into the bowl then measure out 1Tbsp of golden syrup then repeat with the oil then golden syrup, then add the last 2Tbsp of oil. This helps the syrup not to stick to the spoon! Beat or whisk the mixture until well combined then spoon equally between 12 cases. 
  5. Bake for about 25 minutes until browned and springy to the touch. 

Thursday, 10 March 2011

A Perfectly Civilised Brownie

It's the weekend and I go back to my home town. An urge has been teasing my brain for a while, but cake or biscuits is not what I'm craving. They're just not chocolatey enough... Then one night I'm having a sugar-loaded conversation and I realise what I'm really craving is a soft, rich and gooey brownie.  A fun and longer than necessary trip to the supermarket with my candy loving boy and we're in the kitchen having fun throwing whatever we found into the silky mix of dark chocolate and butter. Putting the ginger marmalade and chocolate loaded mix into the oven, we waited in suspense until the timer beeped that 8 minutes was up. Yup. I did say 8. I got so carried away I failed to read my own handwriting which actually said 30 minutes. The result was a barely solid, sugary gooey puddle which we happily scooped with our fingers. So attempt one failed, and it took me a whole train journey back to Oxford and an extra day to find out why.

I've never failed so badly before so this did sting my inner baker's ego a bit, so much so I wanted a take two. I found myself in my kitchen a few days later, determined to make this recipe work.  I wanted orange and spice, and lots of chocolate.  So back to my notebook I went, reading everything through just to make sure I knew what I was doing, which is when I noticed my error. Suddenly it all made sense and I was calling myself all kinds of silly, but that's okay, I could now proceed with my experiment, confident in a higher chance of success.

Leftover Christmas mixed candied peel came out, crystallised ginger, ground ginger, an orange, extra dark chocolate... all went onto my worktop as I pondered proportions. I decided to err on the side of caution for ground ginger, but added the zest of a whole orange.  I wanted a warm spice mix, but humbled by my weekend disaster, I thought I would keep it simple for now. The result? A warm adult brownie, with bits of ginger and orange playing on the senses. Some tweaks I would consider next time is slightly less mixed peel, more ginger, some mixed spices and a shorter baking time for a softer, gooier brownie. The addition of a handful of nuts is another possibility, maybe walnuts or macadamia...

A Perfectly Civilised Brownie
(Makes about 20-24 squares)

Ingredients:
  • 50g Plain Flour
  • 100g Butter
  • 2 Eggs
  • 100g Dark Chocolate (70%)
  • 175g Granulated Sugar
  • 1 Level tsp Baking Powder
  • 25-50g Stem Ginger, chopped
  • 25-50g Mixed Peel
  • 1tsp Ground Ginger
  • Zest of 1 Orange
Method:
  1. Line a 18x28cm/17x11" tin with baking parchment and pre-heat the oven to GM4/180C/350F.
  2. Mix the ginger, mixed peel and ground ginger together and set aside.
  3. Melt the butter and chocolate together, along with the zest over a double boiler until melted. Beat the mixture until silky smooth.
  4. Remove from heat and beat in the eggs one at a time then the ginger, peel and spice mix until well combined.
  5. Pour into the prepared tin and bake for about 25-30 minutes until firm to the touch.
  6. Cool for 10 minutes and cut into squares.


Saturday, 19 February 2011

Cookies and milk go together like...

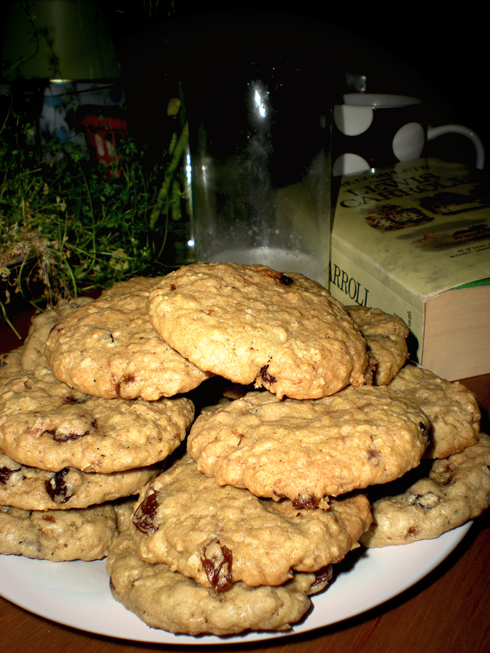
So lately I've been going through a bit of a nibbling phase, roaming around my house trying to find something to graze on, except... grazing is pretty hard to do when there's no food in the house. Two weeks ago is when I thought I needed to go food shopping, one week ago I thought I seriously need to buy food and today? I still had no food. What's a sick girl to do? Too ill to buy food, too peckish to sit at home without restlessly roaming the house, all that I found were sultanas which were kind of nibble food, porridge oats which are definitely not nibble food and a sealed block of chocolate I feel too guilty about breaking into since it was bought for baking.

Tired though I was, baking was my only option to stop myself going mad, so I stayed in the kitchen thinking about what I could do to fix this dire situation I was in. Flapjacks were considered, but with my sore throat, I didn’t think they were going to go down too well, cakes were another option, but then again they just didn’t seem to fit the bill for once… My mind drifted to the chewy cookies I made recently and I realised I haven’t just been craving nibbles; I was craving chewy cookies! Being house bound, I wanted less sweetness and more wholesome cookies so opted to tweak the basic recipe to yield chewy oat cookies, sweetened by sultanas and chocolate chunks. The result was just what I was hoping for – a cookie full goodness, not overly sweet and satisfied my bad case of the munchies.

Chewy Fruit and Oats Cookie
(Makes 24 small)

Ingredients:
  • 150g Plain Flour
  • ¼ tsp Bicarbonate of Soda
  • 90g Butter/Margerine
  • 50g Dark Brown Muscovado Sugar
  • 100g Granulated White Sugar
  • 1 Large Egg
  • 25g Mixed Fruit/Sultanas
  • 50g Dark Chocolate, chopped
  • 100g Oats, lightly toasted (optional)
Method:
  1. Place the butter in a large pan and melt over a low heat. Meanwhile mix the flour, oats and bicarbonate of soda together well. Set the butter aside to cool slightly.
  2. Beat the sugar into the butter followed by the egg.
  3. Stir in the flour mix until well incorporated, then fold in the chocolate and fruit.
  4. Level the mixture then cover with cling film and refrigerate for at least 30 minutes.
  5. Pre-heat the oven to GM5/190C/375F
  6. Drop teaspoon sized balls onto a baking sheet (I put about 8 on a small tray well spaced) and flatten.
  7. Bake for 10-12 minutes or until the edges have just about turned golden. They'll continue to cook on the tray for 1 minute then cool on a wire rack.

Thursday, 10 February 2011

Gluten-Free and Dairy-Free Muffins

Every month or so I have cake duty for SPLAT! at St Ebbes, a play group for toddlers where mummies can enjoy a slice of cake, hear about Jesus and just socialise.  I get the special dietary requirements duty and I've had some good results and some not so good results when trying to produce cakes and biscuits which contained no wheat, milk, butter, oats.... apart from the Tunisian orange cake and layered chocolate cake, the rest tend to either go stale immediately or taste powdery and dry, or worst: taste and feel disgusting, so much so I feel bad handing them over!

My birthday was in December and amongst my wish list was a dinky little book written by Jennifer Katzinger, founder of the Flying Apron Bakery based in Seattle.  Apart from type errors regarding number of muffin cups to pour batter into, it is a very good read and the recipes work beautifully - well the two that I've tried.  I won't lie, the batter looked unpromising, but the result was magic.  There's no other word for it when I think about what goes into your typical muffin: flour, butter, sugar, eggs.... all of which are absent from these deliciously soft muffins.  If you're intolerant to gluten or dairy, or just vegan, this book is amazing.  Naturally the honey is easily interchanged with agave nectar or maple syrup.  Below, I'll leave you with two recipes adapted from my beloved copy of the flying apron's gluten-free and vegan baking book.

Carrot Muffins
(Makes 16)

Ingredients:
  • 1C Rice Flour
  • 1/2C + 1/8C Gram Flour
  • 0.75 tsp Bicarbonate of Soda
  • 0.75 tsp Ground Cinnamon 
  • 1/2C Groundnut Oil
  • 1C Water
  • 1C Honey
  • 3 Sm Carrots, Finely grated
  • 1C Unsweetened Dessicated Coconut
  • 1C Chopped Mixed Nuts
  • 1/2C Mixed Dried Fruit
Method:
  1. Pre-heat the oven to GM4/180C/350F
  2. In a large bowl, mix together the oil, water and honey.  In another bowl mix together the carrots, nuts, fruit and coconut, and in a final bowl, mix together the rice and gram flours, cinnamon and bicarbonate of soda.
  3. Whisk the flour mix into the wet mixture until well combined.  Fold in the carrot mixture until just combined and divide among muffin cases.
  4. Bake for 20-30 minutes until the tops are  golden and firm to the touch.


Lemon & Poppy Seed Muffins
(Makes 14)

Ingredients:
  • 1.5C Rice Flour
  • 3/4C Gram flour
  • 1.5 tsp Bicarbonate of Soda
  • 1/2C Olive Oil
  • 1C Water
  • 1/2tsp Cider Vinegar
  • 1/2C Maple Syrup
  • 1/2C Golden Syrup
  • Zest of 2 Lemons
  • 1/3C Poppy Seeds 
Method:
  1. Pre-heat the oven to GM5/190C/375F
  2. In a large bowl, mix together the oil, water, vinegar, golden and maple syrup.  In another bowl, whisk the rice flour, gram flour, bicarbonate of soda, poppy seeds and lemon zest together well.
  3. Whisk the dry mixture into the wet mixture until well combined.  
  4. Pour the batter evenly between about 14 muffin cases and bake for 20 to 25 minutes until golden and firm to the touch.

Chewy Triple Chocolate Almond Cookies

What is it about cookies and biscuits that is just so moorish?  Especially when it's not quite cheery enough to ponder outside unless absolutely necessary. One cold weekend I found my mind drifting to the kitchen; it is the natural place to drift to when the house feels empty and cold.  A rummage through the treasure trove and I have myself a promising start for a cheerful batch of cookies.  The night will be filled with dancing, but in the meantime I can bake.

I found this basic recipe on the endless resource pool that is Google in my first year of university, and now lovingly return to it with some modifications.  Scooping out chunks of cookie dough is just so satisfying, feeling the mixture stickily mould in my hands into balls of scrumptious goodness.  After affectionately flattening the discs, they spent a short time basking in the oven to come out as large discs of chewy heaven.  The house is now a warm, glowing haven filled with the sweet scent of chocolate and warm thoughts...

Chewy Triple Chocolate Almond Cookies
(Makes about 20)

Ingredients:
325g Plain Flour
1/2 tsp Bicarbonate of Soda
175g Butter/Margarine
100g Dark Muscovado Sugar
200g Granulated Sugar
1 Large Egg
1 Egg Yolk
100g Whole Almonds, chopped
50g Dark Chocolate Chips
50g White Chocolate Chunks
Method:
  1. Place the butter in a large pan and melt over a low heat. Meanwhile mix the flour and bicarbonate of soda together well.  Set the butter aside to cool slightly.
  2. Beat the sugar into the butter followed by the egg and egg yolk.
  3. Stir in the flour mix until well incorporated, then fold in the chocolate and almonds.
  4. Level the mixture then cover with cling film and refrigerate for at least 30 minutes.
  5. Pre-heat the oven to GM5/190C/375F
  6. Drop walnut sized balls onto a baking sheet (I put about 8 on a small tray well spaced) and flatten.
  7. Bake for 10-12 minutes or until the edges have just about turned golden.  They'll continue to cook on the tray for 1 minute, then cool on a wire rack.

Monday, 7 February 2011

Carrot and Coriander Plait

I feel I should start this post with a huge apology for being out of action for so long.  Time has flown by in the last couple of months, but now that the festive season is over and life is returning to normal, I should hopefully be back to cooking lots and sharing them with you.  I thought would start the beginning of a new month with bread. We can't go wrong with bread, bread makes my world go round.  Even better, homemade bread... and better than that? Flavoured bread! I decided on carrot and toasted coriander seeds this time, and it was wonderful.  The loaf came out of the oven golden orange with flecks of coriander seeds peeking out at me.

I love making bread, especially on a day where I'm not needed anywhere. Making bread is associated to a day of rest for me.  I knead the dough at my own pace, lovingly tip it into an oiled bowl and potter around the house until it's ready to be knocked down and shaped.  This time I decided to take a walk with my new house mate in the late winter sun, enjoying the warmth on my face as we trundle along.  This time of year is wonderful. Everything smells of hope and a taster of spring is beginning to creep in, reminding me it is only a few months before the sight of daffodils and other colourful joys start popping up again.  Until then though, we have cheerful bread...

Carrot and Coriander Bread
(Makes 2Lb Loaf)


Ingredients:
  • 375g Plain Flour
  • 125g Wholemeal Flour
  • A pinch of Salt
  • 70ml Vegetable Oil
  • 1.5 tsp Dried Yeast
  • 240ml Warm Water
  • 1 medium Carrot, peeled and grated
  • 1 Tbsp Coriander Seeds

Method:
  1. Mix the yeast and warm water together and leave for 15 minutes to activate and a frothy layer forms on top.
  2. Toast the coriander seeds over a medium heat in a frying pan until lightly browned and aromatic. Tip into a pestle and mortar to bruise the seeds.
  3. Mix together the flours and salt, then combine with the oil.  Once evenly distributed, grate in the carrot and tip in the coriander seeds.  Stir to distribute.
  4. Make a well, pour in the yeast mixture, stir to make a dough and roll out onto a lightly floured surface to knead.  Knead for about 10 minutes until smooth and elastic, and tip into a lightly oiled bowl.  Leave covered in a warm place to double in bulk for about an hour and a half.
  5. Knock the dough down, divide into three balls and roll each one into a long sausage shape.  Press the ends together on one end and plait the strands, sealing the ends together. Pat into shape and leave to prove for 30 minutes more, covered.  Switch on the oven to GM 4/180C/350F to pre-heat.
  6. Bake the plait for 40-45 minutes until lightly golden and the base sounds hollow when knocked.  Turn out onto a wire rack to cool.

Tuesday, 16 November 2010

Healthy Cinnabon anyone?

Every month I go home - and every month as I finish church, I find myself walking in a wonky line into the local T. K. Max.  Unusually though, their clothes hold no interest for me, but their homeware department on the other hand... oh my.  I can happily float around the store and lovingly look at their Le Creuset range, or their farmhouse crockery ranges, flirting with the idea of buying a set of oven dishes or a large earthenware casserole pot; sadly though I do not have my own place and so space is an issue.  As I walk around the store I continue to furnish my future home in my head.  This time though I broke the mould a bit and found myself gazing at their book selection - naturally the cookbook area.  Fingering the slightly dusty spines, a hardback - beautifully photographed popped out at me.  At first the initial cynicism kicked in, whereby I thought that if the poor book made it to a discount store it was bound to be fussy with recipes a mission to follow, ingredients impossible to get hold of even if I knew what they were, and I could go on, but I won't - because this book is truly a gem of a cookbook.  As one review said, it gets respect straight away just by not featuring a single cupcake anywhere - don't get me wrong though, I love a cute cupcake as much as the next person - it's just refreshing to find a baking book which doesn't bank on the fact it contains cupcakes to appeal to its audience.

Are you wondering what this amazing book is called yet? Probably not, but if you are curious, it is called Warm bread and Honey Cake by Gaitri Pagrach-Chandra.  It is a rich book containing history, life anecdotes, and wonderfully simple recipes of baked treats from around the world.  I must say the selling point for me was the in depth feature on the Red Bean Paste cakes commonly enjoyed as mooncakes which is eaten once a year by the Chinese community during the mid-autumn festival where friends and family join together to enjoy watching the moon in its full glory.  The whole book is filled with similar enchanting treats along with a highly fascinating history on how they came to be.  For my house mate's birthday a gluten-free version of her chocolate slice cake was made with ground almonds - although there was enough to serve a small army, this cake disappeared alarmingly fast between 4 chocoholics!  Today though I will leave you with my fruity adaptation of Gaitri's chocolate and hazelnut buns.

Fall Buns
(Makes 8-9)


Ingredients:
Dough:
  • 125g wholemeal flour
  • 125g plain white flour
  • 1.5tsp Dried active yeast
  • 2tsp Sugar
  • Pinch of Salt
  • 55g/2oz/0.5stick Butter, melted and cooled
  • 1 Egg, beaten
  • About 150ml/5fl oz/2/3C Milk, lukewarm

Filling:
  • 2 Medium/200g approx. Bramley/Tart Apples, chopped into 5mm chunks approx.
  • 50g Raisins
  • 2Tbsp Honey
  • 1Tbsp Cinnamon

Method:
  • Whisk together all the dry ingredients, then mix the butter, milk and egg together, add to the dough and mix to bring together into a ball of dough.  Knead for about 10 minutes until the dough is smooth and elastic ( I find I do not need extra flour in the worktop).  If the dough is too sticky, add a sprinkling of flour, if too dry, add a few drops of water.
  • Oil a the bowl, return the dough and coat in the oil then cover with cling film and leave to double in bulk in a warm area - about 1-1.5 hours.
  • Before rolling out the dough, chop up the apples, mix with the honey, and cinnamon and raisins then set aside.
  • Roll out the dough to a rectangle roughly 40cm x 30cm or 16" x 12", then spread with the apple mixture - but leave about 2cm clear all round.
  • Roll up the dough into a sausage starting from the longest edge.  Cut along at 4cm intervals into 8-9 spiralled buns and tuck into a greased round or square cake tin, about 20cm in diameter/width.
  • Cover loosely with a damp tea towel or cling film and leave to rise again for another 30-60 minutes in a warm place until almost doubled in bulk.
    NB: The juices from the apples may leak out into the tin, don't worry about this, it shouldn't affect the bread!
  • Roughly in the last 15 minutes, pre-heat the oven to GM4/180C/350F
  • Bake the buns for 25 minutes or until golden brown.  Leave to cool for 5 minutes then transfer to a wire rack to cool completely - or enjoy warm!

Wednesday, 27 October 2010

Much to do about a Pumpkin

What does usually think of when Halloween once again pops overs for a visit? Well in this household it is what to do with the Jack-O-Lantern left behind? Leave it to go mouldy and try to dispose of it without touching it? Or, chop it up and make it into hearty meals thereby giving Jack a purpose to his short life other than to look spooky-but-not-really for one night.  Naturally we chose the latter, and so jack soon became among other things, part of a lasagne, soup, quick bread and pie.   Jack, you have done well and we look forward to seeing you again next year!  Until then, below will be a record of your invaluable contributions to our happy bellies.

Pumpkin Lasagne:
(Serves 4)

This came about as a result of copious bottles of opened red wine sitting around and a craving for something indulgent but wholesome and a need to empty some almost-finished boxes of lasagne sheets.  I used tinned plum tomatoes, as I don't know about you but for some reason I really do not like the taste of chopped tomatoes!  Try cherry tomatoes too, they are divine in a sauce.

Ingredients:


Red Wine Sauce:
  • About 400g Pumpkin, cubed (1cm)
  • 1 Small Pack (250g) Spinach, Chopped
  • 2 Red Onions, chopped
  • 2 Garlic Cloves, crushed and chopped
  • 1 Carrot, Finely chopped
  • 1 Celery stalk, finely chopped
  • 1Tbsp Fresh Sage, chopped
  • 400g Tin of tomatoes
     -Plus 1/4 Can Water to swill and add to pot
  • 200ml Red Wine
  • 1Tbsp Oil
White Sauce:
  • 1tsp Dried Thyme
  • 300ml Milk
  • 25g Butter
  • 1Tbsp Flour
  • 50g Strong Cheddar Cheese, finely grated
  • Nutmeg, grated
Method:
  1. Pre-heat the oven to GM6/200C/400F
  2. Coat the pumpkin with oil, salt and pepper and roast in oven for about 45 minutes until tender
  3. Coat the base of a large pan with oil (I used sunflower), add the onion, garlic, carrot and celery and gently heat for about 15 minutes with the lid on, stirring occasionally. 
  4. Add the red wine to the vegetables and simmer uncovered gently for about 5 minutes to evaporate the alcohol, then stir in the sage, tomatoes and water.  Break up the tomatoes and stir to mix, then bring to the boil and simmer partially covered for 20-30 minutes gently until all the vegetables are tender.
  5. Meanwhile, pan-fry the spinach in a little oil, and season with nutmeg and pepper.  Set aside.  (I actually used mature spinach from the garden which takes slightly longer to cook, but equally delicious).
  6. Heat the milk and add the thyme until almost boiling.  Remove from heat, season and leave aside to infuse.
  7. Blend the red wine sauce until mostly smooth and stir in the cooked lumps of pumpkin.  Season with salt and pepper.
  8. To make the white sauce, melt the butter gently until sizzling, add the flour and stir over a low heat to cook for about a minute.  Stir in the milk gradually over a medium heat to prevent lumps (whisk if lumps form or keep stirring) until the sauce thickens.  Season and set aside.
  9. Assembly: In a oven-proof dish, layer half the red wine sauce, top with half the spinach then sheets of wetted lasagne sheets.  Top lasagne sheets with the remaining red wine sauce and spinach then another layer of wetted lasagne sheets.  Press down the sheets gently to level and pour over the white sauce.  Top with the grated cheese and put the lasagne in the oven for about 30 minutes until the whole thing is bubbling hot and the top golden.

Pumpkin and Ginger Teabread:
(Serves 10)


This recipe was taken from the BBC Good Food website which was mildly adapted to suit my caeliac of a housemate to be gluten-free.  It's best served warm straight from the oven in my opinion or microwaved for a few seconds on high later on.  Other than plain and simple, I liked spreading Nutella on top of my slice for a little bit of chocolate naughtiness.  I made this in a tray baked for about 50 minutes but of course times vary with ovens or tins used.  The site recommends 50-60 minutes in a 2lb loaf tin.


Ingredients:
  • 175g butter , melted
  • 140g clear honey
  • 1 large egg , beaten
  • 250g raw peeled pumpkin, coarsely grated
     -(about 500g/1lb 2oz before peeling and seeding)
  • 100g light muscovado sugar
  • 350g Gluten-Free self-raising flour
  • 1 tbsp ground ginger
  • 2 tbsp demerara sugar
Method:
  1. Preheat the oven to 180C/gas 4/ fan 160C. Grease and line the base of a tray bake with baking paper.
  2. Mix the butter, honey and egg and stir in the pumpkin or squash. Then mix in the sugar, flour and ginger.
  3. Pour into the prepared tin and sprinkle the top with the demerara sugar. Bake for 40-50 minutes, until risen and golden brown. Leave in the tin for 5 minutes, then turn out and cool on a wire rack. Serve thickly sliced and buttered.
    NB: I found with gluten-free flour the cake was slightly more fragile, so handle with care!

Pumpkin Pie
(Serves 4)

Ingredients:

Filling: 
  • 300g Pumpkin, cubed (1cm)
  • 2 Bay Leaves
  • 1 Courgette, sliced
  • 1 Clove Garlic, crushed and chopped
  • 1 Small Onion, chopped
  • 1 Carrot, finely chopped
  • 1 Celery, sliced
  • 100g Green Lentils
  • 1/4tsp Dried Tyme
  • 1 Tomato, cubed
  • 150ml Red Wine
  • 200ml water (made up with courgette pan juice)
  • 2Tbsp Soya Sauce
Topping:
  • 3 large potatoes (about 300g), peeled and quartered
  • 1 Small Bunch Dill (25g)
  • 1Tbsp Wholegrain Mustard
  • Knob of butter
  • Splash of milk
Method:
  1. Pre-heat oven to GM6/200C/400F
  2. Boil some water with a bay leaf and enough to cover lentils generously and cook for 30-45 minutes until tender.
  3. Coat the pumpkin in oil and season before roasting for 30-45 minutes in the oven until tender.
  4. Heat some oil in a frying pan and pan fry the courgettes over a high heat until lightly singed and withered. Season and set aside.
  5. Swill out the pan and make up to 200ml to make some stock.
  6. In a pan, coat the base of the pan with oil and add the onion, garlic, carrot and celery - cover and cook gently for 15 minutes, stirring occasionally. 
  7. Add tomatoes and cook until softened then add wine and simmer for 5 minute uncovered to evaporate alcohol.  Add the stock, bay leaf, thyme and soya sauce, bring to the boil and simmer covered for about 20-30 minutes until all vegetables are tender.
  8. Meanwhile, boil some salted water and cook the potatoes for about 20 minutes or until tender.  When cooked, mash with butter, mustard and enough milk (about 75-150ml) to make a smooth spreadable mash.  Stir in the dill and season.
  9. Blend the sauce when ready and stir in the pumpkin, courgettes and lentils then seaso.
  10. To assemble: Pour the filling into an oven-proof dish and top with the the mash, level out roughly and bake in the oven for about 30 minutes until bubbling hot and golden.

    Monday, 11 October 2010

    Autumn Harvest - Apples


    Finally, we have come to this beautiful time of year again where the temperature is starting to fall, the air is slightly crisp and the leaves are gradually donning their gilded coats of golds, russets and saffron.  Autumn is my favourite season visually, in terms of the smell in the air - slightly toasty and earthy and of course the abundance of delicious food.  Cue, plump squashes, leafy spinach, chard, various stoned fruits and of course rosy apples and juicy pears!  Goodbye Mediterranean, hello homey comfort food.

    Last week, my house mate and I went scrumping for apples in the derelict orchard down our road which our wonderful nature loving neighbour brought to our attention.  Previously we have drenched our shoes as we trudged about picking brambles and plums in the wet forest, so this time we had the bright idea (well at the time) or wearing flip flops which resulted in a slightly treacherous session in the forest among the clumped nettles, thorny bramble vines snaking across the floor and vertical twigs grappling to skewer our feet.  All in all though,  some tree climbing and clever dodging later, I was triumphantly walking home with my apple bounty.  At home though, after filling a bucket, the problem arose of what to do with it all?

    So in the near future, expect lots of sweet apples treats to be popping up!  So far, I have made rum soaked apple layer cake (yummy but ugly), apple crumble (naturally), apple cupcakes, apple and custard muffins, potato and apple boulangère (Not recommended) and the list will hopefully go on.  Until next time, I leave you with an apple and custard muffin recipe adapted from my M&S cakes books.

    Apple and Custard Cakes:
    (Makes 12 muffins)


    Ingredients:

    • 90g Butter
    • 110g Caster Sugar
    • 2 Eggs
    • 110g Self-raising flour
    • 30g Custard Powder
    • 2Tbsp Milk
    • 1-2 large apples (200g total), cored and thinly sliced
    • 1Tbsp Extra butter, melted
    • 1Tbsp Ground cinnamon
    • 1Tbsp Sugar
    Custard Filling:
    • 1Tbsp Custard Powder
    • 1Tsp Sugar
    • 125ml Milk 

    Method:


    Custard Filling:
    1. Mix a little milk with the custard and sugar to form a paste.  Heat the remaining milk, mix with paste and heat gently until thickened.  Cover and leave to cool.
    Cake mix:

    1. Pre-heat oven to 180C/350F/GM 4 and line a 12-hole muffin tin with paper cases.
    2. Beat together butter and sugar and custard powder until soft and creamy, then whisk in eggs gradually.
    3. Whisk in the milk and fold in flour until just combined (a figure-of-eight motion with the whisk is very effective).
    4. Divide half the mixture among the paper cases, top with custard, then finish with distributing the last of the cake mix among the 12 cases.  Top with sliced apples, pressing in slightly and bake for about 30 minutes. Meanwhile, combine 1Tbsp sugar with ground cinnamon and set aside. 
    5. Turns cakes onto a wire rack, brush with melted butter then sprinkle with the sugar and cinnamon mix. Leave to cool on the wire rack or serve warm.

    Saturday, 9 October 2010

    Poppy Seed Bread

    I feel I should start off this post with a massive apology for not updating for a long while, truth be told I haven't been cooking anything inspiring lately and life's not too bright at the moment, what with a bike crash accident and a lack of supporting job. On the good side though, I've had time to dance more and read more cookbooks. One book I find myself referring to time and again is the Cornucopia at Home cookbook from Dublin's wholefoods vegetarian restaurant. We came across this tiny treasure cove a few years back, and it's heartening to know that the restaurant is doing so well, it's expanding into the building next door.  Rarely, does one find a cookbook and cook through it's contents eagerly, but I have progressively gone through most of the recipes in this book and I can confirm that most of the recipes work beautifully with surprisingly little hassle ending in a homey and delicious meal at the end of my enjoyable labour.

    I finally decided to delve into the bread section of the book recently and tried out their poppyseed load which I have to say was delicious and entertaining seeing poppy seeds make a break for it as I kneaded the dough into a ball of smooth, elastic dough.  I really do not see the point in buying a bread machine when this part of the bread making process is just so soothing.  Upon saying this though, waking up to the smell of bread is lovely and can only be achieved by hand by a dedicated early riser... which I am not. I tend to find myself baking at night so I go to bed to the smell of fresh bread instead which is equally good as I have the anticipation of fresh bread in the morning.

    This bread was lovely with blackberry & ginger chutney and goat's cheese, as well as dunked into thick and creamy soups or simply spread with jam for breakfast.  With that I leave you with a recipe and hopefully an incentive to buy this wonderful cookbook.

    Poppy seed Bread
    (Makes a 2Lb loaf)


    Ingredients:

    • 250g wholemeal/Brown flour
    • 250g plain flour
    • 70g poppy seeds
    • Pinch of salt
    • 70ml vegetable oil
    • 1.5tsp active dried yeast
    • 280ml warm water
    • 0.5tsp honey

    Method:

    • Stir the yeast and honey gently into the warm water and leave to foam for about 10-15 minutes
    • Combine the flours, poppy seeds and salt into one bowl - I used a whisk to mix the dry ingredients together well.   
    • Add the oil and mix well using your fingers to rub the oil into most of the flour.  Just like rubbing butter into flour for pastry.
    • Make a well in the centre of the bowl and pour in the yeast and water mixture.  Mix with your hands until you get a soft ball of dough.
      NB: if sticky, sprinkle more flour and conversely, if too dry, add water a drop at a time to the right consistency.
    • Roll out onto a clean surface (I didn't bother with dusting with flour and it was fine) and knead for about 10 minutes.  Oil the bowl (which should be clean of dough), turn the dough to coat it in the oil and cover with a damp tea towel or clingfilm.  Leave to rise for 1-1.5 hours in a warm place or until doubled in bulk.
    • Knock back/punch the dough to its original size and either put into a 2Lb tin or shape into a loaf shape.  
    • Leave to rise for another 30 minutes - in the last 15 minutes, pre-heat your oven to 180C/350F/GM 4.
    • Slash (do not tear) across the top of your loaf 3-4 times with a sharp knife and place in the oven for 50-60 minutes (tin) or 40-50 minutes if free-form loaf.
    • The bread is ready when it sound hollow when tapped at the base and lightly golden.
    • Leave to cool on a wire rack.  Cover with a tea towel of you want a soft crust. 
    adapted from Cornucopia at home by Eleanor Heffernan

      Monday, 23 August 2010

      What to put in my lunch box?

      Every year, my church hosts a holiday bible club for children from both Christian and non-Christian backgrounds.  This year I have had the pleasure of helping and tomorrow the kids will start flooding in for a week of fun and chaos.  There is a Spy Theme going on, and I'm pondering what to wear for the opening day - Sherlock's cloak or a bowler hat and black tie?? Choices, choices...  More importantly though, the leaders have been told to provide their own lunch, which opens so many possibilities.  For my placement year about two years ago I adopted the Bento lunch style, and I am hoping to repeat this again this year, not just for Holiday Club but for when I start my new job in little more than two weeks' time!  

      I find making my own lunch so much more satisfying than queuing in a mediocre over-priced canteen where vegetarians are forced to buy either cheese laden dishes or salad.  No sir, not for me.  I am interested in tasty and cheap meals, be it left-overs from dinner or quick to prepare and healthy (well sometimes) dishes which have a tendency not to leak.  Upon saying that though, I find a bowl of homemade soup and a hunk of toasted bread in the cooler seasons so satisfying and warming and have somehow managed to carry said soup in a not 100% leak-proof container.  I suspect lots of kitchen roll was involved... Anyhow I digress again, my first lunch which I really hope I remember tomorrow is a couscous salad with broccoli and spinach pesto and grilled vegetables, finished off with an apple cupcake, apple bun and nectarine for dessert and snack.  It sounds complicated but really isn't and is ready in less than 20 minutes, score!  I would say it is a very healthy dish except I am pretty sure I cancelled all health brownie points by adding copious amounts of creamy goats' cheese.  What can I say? I love goats' cheese.  I hope you enjoy making and eating this as much as I do! 

      Couscous with Broccoli and Spinach Pesto and Grilled Vegetables
      (Serves 1)  


      Ingredients:
      • 2 Florets Broccoli - about 50g, broken into small pieces 
      • Handful Spinach, washed
      • 1 Small Red Pepper, deseeded and halved
      • 1 Small Courgette, finely sliced
      • 1/4 Large Onion, finely sliced
      • 1 Clove Garlic, peeled and crushed
      • 1tsp Balsamic Vinegar
      • 1/2tsp Mixed Herbs
      • 10g approx. Goats' Cheese
      • 60-80g Couscous
      • 2tsp Vegetable oil 
      • Salt & Pepper to taste
      Method:
      1. Brush the courgettes and pepper skin lightly with oil then place until a grill until the pepper skins char - about 10 minutes.  In 5 minutes, check the courgettes and flip them to avoid burning.
      2. Cook the couscous as per instructions - I put mine in my lunch box with some pepper and herbs, covered with boiling water and closed the lid for 5 minutes.
      3. Place the broccoli into a ramekin and add about 50ml boiling water and cover with cling film then pierce.  Microwave for about 3 minutes full-power, remove and let stand for 5 minutes, add the spinach, recover and microwave for another minute, then leave to stand to continue cooking.
        -alternatively boil/steam the broccoli then spinach gently until tender
      4. Heat the oil in a small pan, add the onion and garlic and saute for about 5 minutes until the onions look tender.  Season and add the balsamic vinegar.  Peel the pepper and slice thinly, adding to the pan along with the courgette.  Mix well and add the couscous.
      5. Blend or process the broccoli, spinach, and half the goats' cheese until smooth(ish), season and add to the pan. Mix everything together and serve with the remaining cheese or box up for lunch. 

      Apples and Midnight Baking

      It's that time of year again when apples fall in prices in shops and the apple trees dotted around start to shed their fruit, plopping them lightly onto the wet grass below.  Since starting this blog, I have become a lot more aware of fruit trees and brambles, which makes walks that much more exciting.  Cycling past my neighbour last night, out walking his dog, we stopped for a while to have a chat which is when he showed me his "scrumping" bounty - a bag full of crispy looking apples fresh from the orchard straight down my road which I never knew existed before then (the orchard not the road, I'm not that oblivious).  Happy times, I will be sure to go foraging around there later!

      Apple and Cinnamon Cupcakes 

      In the meantime though, I have been blog hopping around the net looking for healthier cupcake sites which is when I came across Anecdotes and Apples, which was filled with wonderful wholesome and homey looking recipes - all vegetarian with a good selection of vegan too.  I came across two recipes which just called out to be made together: apple dapple cupcakes and apple buns.  The cupcake recipe is actually for 24 muffins, so I divided everything by a third which yielded enough for 12 normal cupcakes.  I think I replaced the cream with crème fraîche and quartered the frosting recipe and still had some left over - perfect to go on my apple buns if I so wish.  I also left two unfrosted as they're scrumptious as they are, maybe with a dusting of cinnamon as well...  Originally I thought it would be a good idea to make these before church but that turned into after church then much later after church... Needless to say it was gone midnight by the time I had a batch of lovely bread rolls and cupcakes - but I think there are much less pleasant things to go to bed to than the warm and spicy scent of sweet cinnamon, not to mention the anticipation of waking up to fresh bread!  I halved the bread recipe and reduced the cupcake recipe so ended up only using the one apple - next time though I feel I would happily add an extra one to the bread (the season of apples is oh so near).  Whilst the bread was proofing I made the cupcakes, which gave me something to nibble on whilst the bread was baking - all in all a fun process albeit kind of late... For the bread, I think it needed a longer second rising and/or more flour - but I did try the lower end of the recommended amount of flour and second rising; pushed for time towards the end (bed was calling).  The resultant bread was slightly sticky and elastic - although not unpleasant, just different but still tasty! Next time...


      Anyway to end, I highly recommend you visit Monet's blog, it's packed full of wholesome ideas, the next thing to have caught my attention is the avocado pound cake, I have a glut of avocados which need eating and this sounds perfect! In the meantime though, I'm off for a cup of tea and an apple cupcake.

      Wednesday, 18 August 2010

      Mmmm, cupcakes

      Wow, it really feels like it's been a while since I updated this blog.  On the bright side though, it must mean I am actually becoming busier and my blog addiction is subsiding somewhat... but on second thoughts, I'm completely happy to be blogging again so maybe it hasn't subsided that much!  Over the last week, it seems as if I have been baking every day in one form or another.  Gingerbread men were cut, cupcakes for picnics and birthdays were whipped up, shortbread ducks and stars were created and a frugal hotpot made from the contents of my magical fridge which still does not look as if it is emptying any time soon.


      I have not been the most organised of humans this week, so I thought it would be safer to stay indoors as much as possible to minimise being a danger to myself.  I felt it was going to be one of these weeks.  So far I had managed to mistake a friend coming over on Monday when it was actually Tuesday,  triple-booked myself on said Tuesday, having to reveal my embarrassing blunder to get myself out of two appointments and proceeding to cook an awful lunch for a friend who I was meant to have met Tuesday but postponed until Wednesday...  And today I had an enjoyable walk into town (so far so good...) to the Gloucester Green food market with my friend.   This was my first trek to the market in what feels like months (and it probably was) and I was greeted by a beautifully colourful sight.  Casually sitting on the tables were summer squashes, and other modest vegetables but the fruit stand was a glory to look at: mounds of rosy cheeked apricots, succulent plums, peaches and nectarines, towering punnets of cheap cherries, raspberries and blueberries.  I was also excited to see raw beetroot, which I was inspired to give a go by Designer from our weekend together.  Whilst queueing,  I managed to lose a £2 coin which was upsetting and hit by a sudden downpour of water which has somehow collected in the tent top.  I was rather fuddled by this as I had not realised it had rained today, but it was still sunny when we left the market, so we had time for tea in a Coffee Republic and proceeded to miss the dry spell and got poured on as we ran to Waterstones for shelter.  Quite a feat considering I was lugging an impressively heavy food laden backpack and my friend a bag of delicate soft fruits!  A leisurely read of the River Cottage Preserves Handbook later and a tentative glance outside the second storey window, and we were ready to brave the walk back home which promptly led to a blister forming which became ripped and painful, successfully rendering myself incapable of dancing tonight.  Every cloud has a silver lining though, we ended up curling up to watch Singing in the Rain instead which I had forgotten how much I had loved.  So it looks like my week of bad luck hasn't run dry yet, let's hope tomorrow will be better!

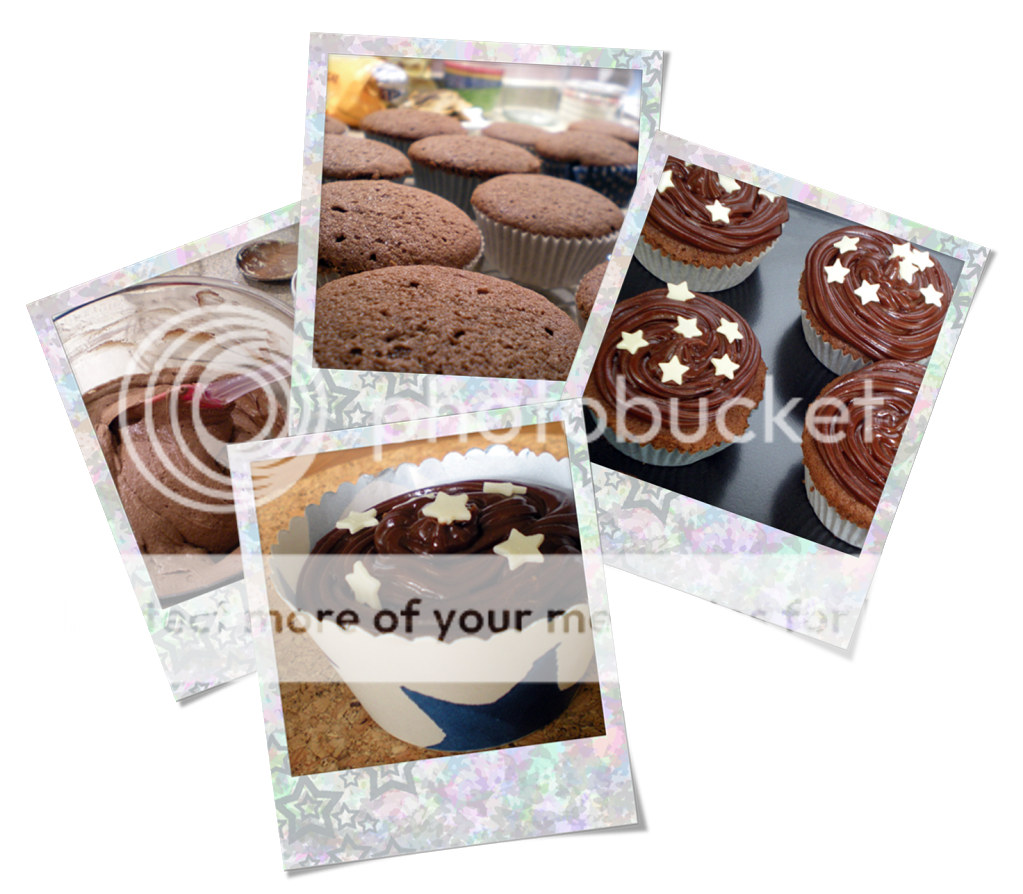
      I do like to digress, but back on topic, below are two recipes for mocha cupcakes and shortbread.  I missed my friend's birthday over the month of July due to caring for my mum so I made him a very belated mocha cupcake and mini duckie shortbread instead.  The Shortbread recipe was based on a Delia Smith Recipe which can be found on her website - I just replaced the cornmeal with rice flour as I found cornmeal weirdly chewy the last time I used it.  I love all kinds of shortbread but my favourite are the thin and crispy ones which make me feel more saintly until I realise I have just eaten the whole batch.  The mocha cupcakes I kind of made up on the spot using basic cupcake knowledge.  I wanted to use coffee, so increased the flour to 125g from 100g, but added the standard 25g cocoa.  I used about 2 Tablespoons of hot coffee in the end, so wasn't quite sure how they were going to turn out!  After a 15 minute wait of suspense, the cupcakes came out wonderfully moist and soft.  I really recommend them if you're a coffee lover. With that I leave you and hopefully I'll make it to update again soon still in one piece!

      Mocha-Choca Cupcakes
      (Makes 16-18)

      Ingredients:
      • 100g Margarine
      • 125g Self-raising flour
      • 25g Cocoa
      • 2Tbsp Very Strong coffee
         - I made mine with 3tsp coffee granules in 4Tbsp hot water
      • 2 Eggs
      • 45g Dark eating chocolate 
      • 15g Butter
      • 80g Icing sugar
      Method:
      1. Pre-heat the oven to gas mark 4/180C/350F Cream the margarine and sugar together until light and fluffy
      2. Gradually whisk in the eggs
      3. Carefully and gradually whisk in the coffee - don't worry if it curdles a bit - just add some flour
      4. Mix together the flour and cocoa, then fold into the mixture until just incorporated
      5. Spoon teaspoon mixtures into cupcake cases until 3/4 full
      6. Bake for 15-20 minutes until risen and the sponge bounces back when lightly pressed.
      7. Leave to cool and make the chocolate icing
      8. Melt the butter and chocolate together over a double boiler or carefully in the microwave.
      9. Stir in the icing sugar and add enough coffee (preferably hot) to make the icing either spreadable or piping consistency.
      10. Pipe or spread onto the cool cakes and leave to set.  Before it sets, I added some white chocolate stars to the frosting.   
      NB: With the chocolate icing, I only made enough for about nine of my cakes as I: i) prefer some un-iced and ii) only wanted to ice a few for my friend's birthday presentation.  Just double the recipe (chocolate, icing and butter) to cover all the cakes.  If you are spreading, you'll probably have enough with just the half recipe.  I use cheap dark chocolate for this as I still get a glossy frosting and the sugar content works better than expensive dark chocolate which tend to be more bitter.

      Shortbread Thins
      (Makes about 2 trays worth)


      Ingredients:
      • 40g Rice Flour
      • 75g Plain Flour
      • 40g Caster sugar
      • 75g Margarine or Butter
          - I used half of margarine and butter
      Method:
      1. Pre-heat Oven to gas mark 2/150C/300F
      2. Cream the butter and sugar together until light
      3. Add the flour and rice flour, mixing to form crumbs.  Push the mixture together with the wooden spoon or your hands until it resembles a crumbly ball of dough.  
      4. Roll out thinly - about 3mm and cut out shapes with a cutter
      5. Place on a non-stick/greased baking sheet and bake for 15-20 minutes until just golden.

      Monday, 16 August 2010

      A Lazy Sunday

      The Girls came over from London and Southampton on Saturday, which turned out to be a stormy day filled with torrential rain.  Nonetheless, we had amples of fun buying an ambitious amount of alcohol and mixtures and slogging home in the downpour.  It was lovely catching up with them, as I have not seen some of them for over a year - another scary indication of how fast time flies.  Originally we were planning on a cocktail session at home, then a leisurely mini pub-crawl.  One pub later and we were back in the house sipping hot chocolate and ready for bed!  How the times have changed and I really am beginning to feel old! Luckily for me, I was not the first to cave so the "host" can not be blamed for the end of the "party"...

       
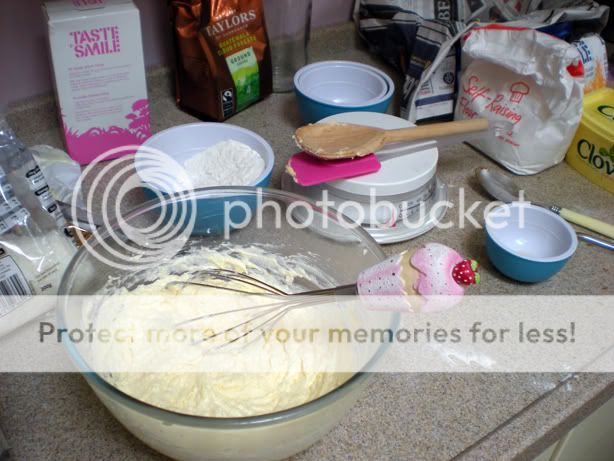
      My messy worktop

      A morning chat, some rustling and mini activity of packing later and I hugged The Girls goodbye.  The end of one event and another unexpectedly appears.  One machine wash load later and I found myself entertaining The Anthropologist and Pixie Boy.  Originally I was supposed to have met up with people from Ceroc in University Parks for a picnic.  Needless to say, by the time I had finished two wash loads, made a batch of coconut cupcakes and for Mini to come over, it was hardly worth the hour and half trek to the picnic.  Sabotage was in order, so a quick text later and we were off to our own picnic in the park down the road... which I must say I approved of much more.  I am all for energy conservation and a walk longer than an hour just seemed unnecessary on a Sunday afternoon.  Another friend met us up in the Park, contributing Jaffa cakes and giant chocolate buttons and we were set to enjoy a beautiful afternoon which turned into an equally stunning evening.

      Raspberry-Filled Coconut Cupcakes
      (Makes 10-12)


      Ingredients:
      • 50g Butter
      • 50g Self raising flour
      • 50g Dessicated coconut
      • 50g Caster sugar
      • Raspberry Jam
      • Icing Sugar to dust
      Method:
      1. Pre-heat the oven to gas mark 4/180C/350F Cream the margarine and sugar together until light and fluffy
      2. Gradually whisk in the egg
      3. Whisk in the coconut
      4. Fold the flour into the mixture until just incorporated
      5. Spoon teaspoon mixtures into cupcake cases until 3/4 full
      6. Bake for 15-20 minutes until risen and the sponge bounces back when lightly pressed.
      7. Leave to cool and make beat the jam in a bowl to soften
      8. Cut a cone out of the centre of each cake, fill with jam and replace.
      9. Dust the cakes with icing and enjoy!  
      NB: I wanted to make a small batch of cupcakes for a small picnic and made these.  I wanted frosting but from experience knew it would be hard to transport so opted for a filling instead, which means if need be, the cupcakes can be stacked.  


        Monday, 2 August 2010

        Who said birthday parties were for kids?

        Today was another beautiful Sunday.  At the end of the morning service whilst socialising with the church family, a friend of mine I have not seen in a while brought up the fact that today was her birthday - the one occasion where we can be spoiled and celebrate!  She chose to do so with a tea party, so with a few hours to spare I went home to bake a batch of cupcakes as I didn't have time to find a last second present.  When in doubt, one can not go wrong with cupcakes I feel.  I decided to make a lemon and poppy seed cupcake batch (recipe below) but didn't really have the time to rummage for a recipe, so hoped it all turned out OK in time for the tea party by adapting a Victoria sponge recipe I luckily have handy in my head.  I decided to frost some of the cakes in a lemon butter cream with pink edible sparkles.  One word of warning though, if you ever think about pouring a teaspoon of milk from a 4 pint bottle, just don't and pour it out into a smaller container/jug.  I managed about half a spoon, wanted more and promptly got a good glug of milk ruining the lovely consistency of my butter cream.  Running out of time, I did not think to pour some out then thicken up with more icing sugar, so having gone through an unnatural amount of icing sugar, I ended up with a huge batch of not quite firm buttercream.  Promptly piping the icing on to the cupcakes, they were then jammed into a round tin.  My theory was that if they were crammed tightly enough they'd survive the bike journey I was about to inflict on them, runny icing and all.


        Someone's cake stand containing scrummy chocolate cake

        The day was quite cloudy but warm and merry all the same.  I made a pit stop outside another friend's flat en route and we walked together to the Birthday Girl's burrow - round tin of cupcakes fighting against the bungee ties I strapped around them to my trusty pannier.  Upon arrival we wound our way round their shabby chic flat to the back, which was transformed with bunting hung up around the garden with tea sets and platters of finger sandwiches and sweet treats strewn around the grass.  What a wonderful sight!  Tucked into a corner, made (as we found out later) from deck chairs and Cath Kidston fabric was a cute tent for the kiddies and a picnic blanket completed the scene.  The cupcakes surprisingly survived the journey intact and was a popular hit with the guests.  I think I managed return home after evening service with two left which I promptly took photos of before engulfing - naturally washing it all down with a mug of tea.  Another week gone, and another satisfying end to it.

        Lemon and Poppy Seed Cupcakes
        (Makes 12)


         Non-Iced Cupcakes, still yummy!

        Ingredients:
        • 100g/4oz Plain flour  
        • 1.5tsp Baking powder
        • 100g/4oz Margarine
        • 100g/4oz Caster Sugar
        • 2 Large Eggs
        • 150g/6oz Icing Sugar, sifted
        • 25g Butter
        • Zest and juice of one Lemon 
        • 2-3tsp Poppy seeds
        Method:
        1. Weigh out all ingredients and leave to reach room temperature.  Preheat the oven to Gas Mark 4/180C/350F and line a muffin tin with cupcake (or muffin) cases.  If using cupcake cases, you might need two tins.  I happily about 18 cupcakes with my mixture quantity. 
        2. Beat the margarine, sugar, lemon zest and poppy seeds together until pale and creamy.
        3. Beat the eggs and gradually whisk into the mixture.
        4. Fold in the flour and baking powder.  Alternatively use self-raising flour and miss out the baking powder (I just didn't have any to hand at the time).
        5. Pour teaspoons of the cake mix into the cupcake cases until about a third filled.  Same applies to the muffin cases.
        6. Bake for 20-25 minutes or until lightly golden and the centre springs back when lightly pressed.
        7. Meanwhile, beat the butter and gradually adding sifted icing sugar to avoid lumps.  Thin with lemon juice and continue to beat until pale and creamy.  If you want, thin with some milk too for a richer butter cream.
        8. Transfer to a piping bag/tube and once the cupcakes are cool, pipe on in a circled spiral to form a small mountain of frosting.
        9. Don't think about taking the fresh batch on a bike ride, instead leave to set a while and enjoy in the comfort of your home with a cup of tea.

        NB: Although I made cupcakes, there was enough mixture to make 12 muffins.  Usually I use a 3oz/75g quantity and 1 large egg. 

        Also sorry for the awful photo qualities, they were taken at night/when the light had disappeared. 

        Friday, 30 July 2010

        Au Revoir?

        For now, this post will be short as it is not my happiest, albeit I hope it doesn’t give a depressed feel either.  I guess I'm just feeling a bit nostalgic, dreaming of the days when decisions weren't so hard to make or implement, and friends were conveniently clustered into one easy to reach area.  The time has come yet again when mass goodbyes are to be had.  Not only am I returning to my beloved Oxford, but a colleague at work is also leaving.  Unlike me though she is definitely leaving whereas I am still not sure.  Like the Terminator, I will be back... maybe.  It's a sad time, and doesn't appear to be getting any easier.  Just as I re-acquaint myself with everyone in the bustle of Southampton and get to love them all again, I up and leave them once more.  I guess I miss belonging to one area as well, it's strange being a drifter - finishing university is a lot more than just no more lectures, it cuts one loose like one can not ever have imagined.  Suddenly I am asking myself where I belong, must I move on? Settle where I am? Go back home? Or is now really the time to break free completely?  Scary.  I suppose I will feel better once I find a job and when my lack of income can stop making me feel so insecure.

        In the meantime though, I continue to bake and write in my blog, and below is a variation of the chocolate sponge cake  I thought I would try out for my leaving colleague.  Once again I had issues taking the cake off the DIY cake rack and was sad to see that icing sugar made the whole thing horrible to look at, so take two on the other side of the cake, I used my remaining flaked almonds and some sugar to dust the cake instead.  Result? Better, but I need to find a way to stop my cake sticking.  Maybe next time I will cool the sponges on sugar dusted greaseproof paper, which is what I do when I make Swiss rolls.  I made the cake in the evening, so no natural light was to be had, I tried dimming the flash a bit but to no avail.  So if you all see a psychedelic cake, I apologise in advance.  It looks normal on my monitor…

        Lemon Sponge Cake
         (serves 8)

         
         Ingredients:
        100g Self-raising flour
        125g Caster sugar
        4 Large Eggs
        1Tbsp Water

        Zest of  Lemon
        Juice of half a lemon
        25g Butter
        3 oz Icing sugar
        25g Flaked almonds
        Sugar to dust

        Method:
        1. Preheat the oven to Gas Mark 4/170C/350F
        2. Over a gentle double boiler, whisk the eggs, lemon zest and sugar together until tripled in bulk.  This took me just over 5 minutes to whisk by hand using a large whisk.
        3. Remove from the heat and continue to whisk for about 2 minutes until the mixture has cooled.
        4. Dribble in the water down the side of the bowl and sift in the flour.  Using a figure-of-eight motion, fold in the flour with a spatula or metal dessert spoon until just incorporated.
        5. Pour evenly between the two sandwich tins, level and bake for 25-30 minutes or until golden and beginning to shrink from the sides.  If the sponge springs back when lightly pressed it is ready.
        6. Meanwhile, allow the butter to soften before beating and gradually adding the sifted icing sugar.  Add enough lemon juice to make a spread able consistency.
        7. Turn the cakes out onto cake racks to cool and sandwich together with the lemon butter icing, then sprinkle with almonds and sugar to garnish.

        NB: You could sprinkle the almonds onto one sponge before it enters the oven to get toasted almonds - they might stay on better as well.

        Saturday, 10 July 2010

        Summertime and the picnics are waiting

        One of the many joys of summer are the numerous fun ways of dining. Recently I organised a picnic with some friends I love to go dancing with. The feast included homemade rosemary and onion seed focaccia, stuffed with homemade marinated grilled peppers with pesto, salad and mozzarella. Juicy fresh apricots, satsumas, apples and strawberries with cream added a fresh and healthier tone to the day balanced out with butterfly fairy cakes made with a yoghurt frosting and strawberries.

        Part of our Picnic Feast

        The day was wonderful filled with sun, laughter and dancing - a perfect day! I look forward to similar days whilst England continues its summery trend.
         
        Sandwich Focaccia with Rosemary
        (Serves 8-10)
         -adapted from Vegetarian Cooking for Everyone by Deborah Madison


        Ingredients:
        • 2 Cups Warm water
        • 2.25tsp/7g/1 Sachet Dry yeast
        • 1tsp Sugar
        • 3Tbsp Extra virgin olive oil
          -plus extra to glaze
        • 1.50tsp Salt
        • 1-2Tbsp Rosemary
        • 1 Cup Wholemeal/Brown flour
        • 5 Cups Plain/Bread Flour
        • About 2Tbsp Cornmeal/Polenta to dust
        • 1Tbsp Black Onion Seeds
        Method:
        1. Stir the yeast and sugar into the warm water and leave until foamy - at least 10 minutes.
        2. Pound or chop the rosemary until finely minced and add to an oiled bowl along with the yeast mixture, wholemeal flour, salt and olive oil.
        3. Gradually add the remaining flour until a dough forms and turn out onto a floured surface and knead until smooth.  Return the dough to an oiled bowl, coat in the oil by rolling then cover with a damp tea towel or cling film.  Leave the dough to rise until doubled in bulk - At least an hour.
        4. Oil a baking sheet/pan and dust with fine cornmeal/polenta, then roll out the dough to roughly fit the pan.
        5. Press the dough into the pan until about even, cover and let rise for another hour or so.  The dough should be tender to the touch.
        6. Preheat the oven to Gas Mark 6/200C/400F during the last 15 minutes.
        7. Dimple the dough with fingertips, brush with olive oil, sprinkle with onion seeds or more rosemary and bake for 30 minutes in the bottom third of your oven, or until lightly golden.
        Marinated Grilled Peppers:

        Ingredients:
        • 2 Large Red peppers
        • 3 Cloves of Garlic, crushed
        • Vegetable oil to cover - About 100ml
        • 10 Sundried tomatoes in oil, chopped
          -or reconstituted from dried
        • 1-2tsp Sundried tomato puree/paste 
        • 1-3tsp Balsamic vinegar
        • 1-2 dried chillies, crushed
        • Mixed Herbs
        • Salt and Pepper to taste
        Method:
        1. Half and seed the peppers then lay skin-side up under a hot grill.  Grill for about 5-10 minutes or until the skin blisters and becomes charred in places.
        2. Remove to a bowl and cover with clingfilm until cool enough to handle - about 5 minutes.
        3. Meanwhile make the marinade in a small pot (about 200ml) by mixing together the sundried tomatoes, balsamic vinegar, tomato puree, herbs, chillies, salt and pepper.  Dilute with 1-2Tbsp vegetable oil.  Any cheap oil will do here as it only acts as a flavour carrier. 
        4. Peel the peppers and slice thinly.  Mix into the marinade well, coating all the slices and compact into the pot.  Add more oil until just covered and leave for a few hours, preferably over night in the fridge.  The smell and taste the next day is amazing.
        Mediterranean Focaccia Sandwich:
        (Makes 8-10)

        Ingredients: 
        • Focaccia Bread, cut into sqaures (See above for recipe)
        • Marinated grilled peppers (See above for recipe)
        • Pesto (shop-bought or homemade)
        • Sundried tomato paste/puree
        • Mozzarella, sliced
        • Salad Leaves
        • Brown/Greaseproof paper and string to wrap

        Method:
        1. Slice each focaccia square in half and spread with pesto on one side and sundried tomato paste on the other.
        2. Drain most of the oil off the peppers and layer with the marinated sundried tomatoes onto one side the focaccia. Layer some salad leaves on top then some sliced mozzarella and more salad, place the other half of the focaccia on top, wrap in brown paper and tie together with twine or kitchen string.
        Although it sounds like a lot of effort, I got so many compliments on how wonderful they looked and they made transportation of the sandwiches easy as I didn't need to worry about them falling apart.

        Scrap Busting the Matryoshka Way

        I got gifted this doll pattern from Bee Sew Inspired and it's been on my want to make list since it came out. Initially I had a fleet of...