Tuesday 19 October 2021

Scrap Busting the Matryoshka Way


I got gifted this doll pattern from Bee Sew Inspired and it's been on my want to make list since it came out. Initially I had a fleet of Christmas hanging decorations in mind but the smallest one is actually bigger than I thought so I might brave shrinking it more next time. They come in 3 sizes: 6", 8" and 10" - I was only going to make one but you know... they' re so addictive and satisfying I had to make them all! 


This is the perfect project for those bits of scraps I've been saving - in fact everything but the felt faces and trims came from the scrap bin. I love how they all come together into an eclectic collection that just sings of the joy of mixing prints and colours. 


We inherited a beautiful wooden Matryoshka doll set a couple of years back from our late great nan. The kids would play with them for hours and it was the most beautiful items to remember her by. I read up a little on what they represent after a friend commented they were their symbol of motherhood and it's a really cute and empowering story! Each doll represents a mother with a child in her womb, passing down their legacy through all the generations. I've now added to the dolls with my textile ones and it's been lovely looking at them in a row reminiscing about our past family, feeling grateful for my current family and looking forward to future generations to come. A really powerful visual to remind us of how empowered we are as women - experiencing the development of our babes within us, watching them grow and possibly create a family of their own all the while displaying traits and habits picked up from family!


I loved making this project! I used PVA glue on the smallest and first doll but switched to Fusible web on the other two as it was much tidier. I hand embroidered their sweet faces and machine stitched everything else down! I love how this pattern doesn't have to be felt so I used whatever I could find in my scrap pile. 


Most of my fabric came from Minerva.com and my pattern came from Bee Sew Inspired over at https://www.beesewinspired.com/product-page/matryoshka-winter-doll-ornament


Tuesday 28 September 2021

A happy print, a happy make, a new buddy


Hello everyone! It's been a while hasn't it? As I was getting lost on Facebook, I remembered about my poor neglected blog. I'm going to try something new and instead of posting repetitively in lots of groups I'm going to focus my efforts on writing this post instead.

This month I've made a backpack to replace the trashed one my daughter had from last year. I recieved this gorgeous Art Gallery cotton from Minerva.com (full review on their site: https://www.minerva.com/posts/1101452) and I just knew it would make an awesome backpack. The last bag I made was years ago for my husband so I was a little nervous. I made a few mistakes, but overall I love how it came out! I might hand sew the corners next time becasue with my very stiff foam interfacing I struggled to get the seam under the walking foot, even with it hand tacked in place. 

I made this adorable Owl Doll from Bee Sew Inspired at the same time for the nights I didn't want to fight with the machine. Recently I discovered the joys of hand embroidery as a way to stay creative and active (bacause I really can't just sit!) but still be able to watch televison. We've been enjoying Scoropin on Netflix and it's really entertaining! They're taking it down soon though so we'll never get to the end of the seasons. Hopefully it'll return soon so we can finsih it!


I appliqued the Owl's face and details on. I decided to simplify it somewhat and forgoed the tufty ears and ear tufy embroidery details. I used felt for the applique details and hand embroiderd to secure them to the face. There was a lot of details in the eyes so I took the opportunity to try a range of stitches from satin stitch, blanket stitch to backstith and stem stitch. I really love how stem stitched add depth to line details and more texture. I realised that after years of sewing, mastering new stitches and embroidering increasingly more, my abiltiy to sew even straight stitches is as bad as it was from when I started. Looking at my work though, I'm okay with that! The uneveness just screams handmade but I really like how it adds a rustic element to my rag doll too. Not too shabby I think! 
I took so many photos this round, I wanted to get the details of the backpack for my Minerva fabric review but the love my kiddo was showing her owl and the mischievous joy leaking out her eyes whenever we do photos these days had me snapping merrrily along with no thought to the work I would give myself later in sorting and ediitng! The light is fading here in the UK as we rapidly enter Autumn and darker days. I find myself throwng in fake light rays again in a desperate attempt to incorporate some warmth into out green and wet light. Despite the artificial rays I really do love this time of year where photography wise I tend to go for more golden hues. 

Next on my list around custom orders is a birthday gown made of Rainbow organza and tulle. Lots of tulle. And horsebraid... Wish me luck! 

Patterns used: 


Backpack - Marigold by Violette Field Threads 
    https://violettefieldthreads.com/products/marigold-backpack 

Owl Doll - Bee Sew Inspired 
     https://www.beesewinspired.com/product-page/owl-doll-sewing-pattern 

Owl's Dress - Dress pattern included with the Katie Cat Stuffie pattern from Violette Field Threads 
    https://violettefieldthreads.com/products/katie-cat-18-doll-pattern

Tuesday 13 April 2021

Down the rabbit hole again

 Hello friends!

I had such good intentions of keeping my blog regular and up to date but life is not to be. Things got busy, family got ill, life turned upside down and everything recreational was only done in stolen time. It's been a tough year and it's only 2021! 

I have thoroughly enjoyed pattern testing still but have had to really reign in my addiction by not signing up to everything. My favourite companies to sew for this year have had to be:

Sofiona Designs - They have such a fun range of patterns perfectly suited to the girls who aren't always about ruffles and frills anymore. They have have plenty of pretty clothes but as my littlest began to shoot upwards but not outwards, this company has been a God send for wearable basics with that little bit extra! In the process I've enjoyed delving into their Junior Misses range too and now can admit I am much more trend setting mama rather than the failing to get dressed properly mama! Junior sizing goes from 0 to 20!

Bonfire Hoodie and Rocky Shore Tights 


Balsam Bag 

Cloudberry 


Tundra top and Balsam Bag


Railway Joggers 
Rocky Shore Tights

Violette Field Threads - Have really been pumping out hit after hit in the Misses size range. I've been adding to my wardrobe at a happy speed, filling it with flouncy t-shirts, romantic skirts and pretty summer dresses!


Peyton Top
Delaney Dress
Eleanor Collar

Twig+Tale: Their release is slow but I've had a lot of fun playing the slow turnaround game. I made rain hats, sun hats, flower hats, in fact it feels like all the hats from them and sewed up a lovely set of Fable dresses for me and the girls! 


Peony Patterns: Every now and one just has to return to the vintage and flounce, and I joined the Peony Patterns testing group with a lot of excitement for their beautiful designs! They're expanding their team this yeast and we've had so much fun sewing up their stunning debut designs! 

Iris Embroidery File and Petunia Purse (VFT)

Jasmine 
Lily

Hyacinth

Bee Sew Inspired: As life got more hectic I stepped away a little from testing with it's fast turnaround time and my attention was drawn to a new little Canadian group called Bee Sew Inspired. They have absolutely an adorable range of rag dolls and I am also about to embark on my first quilt project!


So life has been busy, life has been frustrating and hard, change is happening soon and this is the last stretch but in that period creating has brought me through reminding me that there is so much more than just pain and suffering going on as we continue to try to provide care for my end of life mum.


Until next time!

X

Thursday 19 September 2019

Why hello again!


It's been a while my friends, and a lot has happened since I started this blog when I was but a mere student. I now find myself married with two gorgeous imps, managing a Victorian house in a lovely quiet street in Southampton. My eldest is now 6, the littlest almost 4 and I finally have a little more space to focus on my thing again.


I took up sewing! I love sewing and I think that's an understatement. Soon after getting a foothold into the world of pattern testing, I now almost exclusively sew my girls' wardrobe of clothes along with my own. The world of PDF patterns is wide and inspiring and I sew almost daily in an attempt to work through the endless list of patterns I bought out of excitement countless times.


It's been three years since we moved back to my home town to support my mum who's battling the late stages of cancer. It's been such a blessing though as I've received so much help with the girls, with my health, gaining a wonderful local community along the way. Daddy imp also has a 9-5 job so we're stable in terms of routine finally and life isn't so reactive with no time to think or feel. I finally feel ready to dust my blog up and start again!


So I look forward to posting some more soon, but until then take care!


Sunday 7 August 2011

Barcelona and Rosehips

Rosehips are weird. I never know if I like them or not, and from all I heard and read it was always too risky to pick myself. Under ripe and apparently the seeds have dangerous or unpleasant effects on your throat and digestive tract, over ripe and it's hard to prepare them.  I always avoided rosehips until recently when just a couple of days before my summer holiday to Barcelona my fiancée's mum gave a good bagful of the cheery red baubles. I won't lie, although I recognised them, I was at a complete loss as to what to do with them. Eaten alone (seeds and all), they tasted okay, kind of earthy with a twinge or what might be called sweet or berry like. Standing in my kicthen after a brief search through the web to see what I could do with them in a short space of time, I found a recipe for a quickbread and candied rosehips, both of which were delicious. The quickbread is citrusy and sweet, coupled with the fun crunch of poppy seeds. As can be seen, it goes perfectly with a good mug of tea.

Once again I felt let down by Spain. This time I went with my then boyfriend, and now amazing fiancée. We landed in Catalan and endured a brown and withered landscape drive to Barcelona where to my dismay at least we found the place not brightly coloured and vibrant with life as expected, but more overcrowded with slum-like dusty houses - one of which was our apartment for our stay. Within four days I had been robbed twice and totally dependent on my other half but despite that it wasn't all bad.

The whole holiday was wonderful in so many ways, and we saw some breathtaking works of art. Gaudi's Cathedral Basílica i Temple Expiatori de la Sagrada Família was one of the highlights of our trip. As we stood in the main worship hall gazing around at the glory engulfing us, it felt like I had found a place so permeated with God, we spent most of the visit in awed silence, walking around wondering how one man managed to not just think up this grand design but also get a plan together enough to make it reality. The city was quite fun too in hindsight, we found an amazing little fondue restaurant called La Carassa tucked away in an alley with low lighting, embroidered drapes around the place with friendly and humorous waiters. We had an amazing fondue with crayfish and rustic bread; the night ending with a red carnation as we left the cosy nest to tipsily trundle through the night life of Barcelona.

Our flight home was uncomplicated and as we landed back in England, I heaved an internal sigh and I don't know about you but to me, it's good to be back home.

Rosehip Quickbread
(makes a 2Ib loaf)


Ingredients:
  • 4-5 Clementines, peeled and puréed plus water to make up to 1C/240ml
  • 0.5C/120ml Dried mixed fruit
  • 0.75C/180ml Rose hips, seeded and chopped
  •  2Tbsp/30ml Butter, melted
  • 1 Egg, beaten
  • 1-1.5C/360ml Plain flour
  • Scant 1C/200g Sugar
  • 1tsp/5ml Baking Powder
  • 0.5tsp/2.5ml Bicarbonate of Soda
  • 0.5C/100g Mixed nuts and/or seeds
    • I used 1Tbsp of Linseed, 1Tbsp Wheatgerm and 2Tbsp Poppy seeds
Method:
  1. In a large bowl, mix together: orange juice, mixed fruit, rose hips, butter and egg.
  2. Sift together dry ingredients: flour, baking powder, bicarbonate of soda, and sugar.
  3. Add Dry mix to wet mix and stir until just combined. Fold in the seeds gently.
  4. Spoon the mixture into a greased loaf tin (8" x 5"/20cm x 12cm) with a lined base and bake in a pre-heated oven at 350F/175C/GM3.5 for about an hour.

Thursday 26 May 2011

Oaty Apple Cookies

I feel I should start this entry with a fat apology. I think it’s safe to say I’ve hit my first blogger’s block, although it’s not just the writing but the cooking too. Recently I’ve started a new job alongside my current one, which means I have practically no time to indulge in adventurous cooking or baking. A few days ago though I was reading a new entry by the Traveller’s Lunchbox blog and noticed a tempting cookie recipe. I thought about how much work I had to do and sadly left it alone. Last night however, after getting home from my second job, I decided I didn’t want to go back to work yet again and so began a soothing session in the kitchen. Tiredly I roamed around gathering bowls, spoons and scales, but as I laid my equipment out, a happy serenity floated over me. Tired I might be, but I’ve really missed baking; the weighing out of raw ingredients, the relaxed combining of everything into luxurious dough, filling the kitchen with a deliciously sweet aroma. How can one feel down with the scent of warm cinnamon and apples permeating through all the rooms of the house?

Thank you Miss Designer for seeing how I am and reminding me of my neglect of my poor blog. Hopefully as I adjust to new work hours, I will make time for more cooking and baking sessions, because like baking I’ve missed writing on my blog too!

Below is a cookie recipe adapted from and inspired by a recipe shared by the Traveller’s Lunchbox.  I decided to go for a fruitier option with oats instead of chocolate. After Easter, I find the joys of chocolate have left me somewhat and I welcome treats which omit it completely.

Soft Cinnamon, Oats and Apple Cookies
(Makes 8 large cookies)

Ingredients:
  • 5.5oz/160g Plain flour
  • ½ tsp Baking powder
  • ¼ tsp Bicarbonate of soda
  • 1 large Egg
  • 4oz/100g Butter, melted
  • 2.5oz/75g Brown Sugar
  • 2.5oz/75g Granulated sugar
  • 1 Tbsp (15ml) vegetable oil
  • 1oz/25g Porridge oats
  • 1oz/25g Mixed Fruit
  • 1 Apple, cubed (5mm) – about 4.5oz/125g prepared weight

Method:
  1. Preheat Oven to GM6/200C/400F
  2. Coat the apples in 1Tbsp of the white sugar and place in the oven to dry out for about 15-20 minutes – checking occasionally.
  3. Mix together the flour, oats, baking powder and bicarbonate of soda and set aside.
  4. Add to the melted butter the oil and mix well. Add the sugar and eggs and whisk until smooth.
  5. Fold in the flour mixture until evenly mixed then add the mixed fruit and apples and mix until evenly distributed. 
  6. Chill the mixture for 5-10 minutes until firm enough to roll into 8 golf ball sized pieces, then put on a tray and freeze for at least 30 minutes.
  7. Preheat the oven to GM6/200C/400F and lay about 4 balls of dough to a tray, spaced at least 5cm/2inches apart. Bake for 10 minutes then reduce the oven temperature to GM3/160C/325F and bake a further 10-15 minutes until the edges are golden. Switch the oven off and leave the cookies to cool on the sheet before moving to a wire rack. I left my cookies to set in the oven for about 5 minutes before removing to cool completely.

Saturday 2 April 2011

How about a cake missing its main three elements?

Is anyone else loving the smell and sight of spring? I walked through an abandoned apple orchard today and as I entered the narrow gap, startled a young doe.  Blossoms were beginning to erupt but it will be several weeks yet before the whole orchard comes into bloom.  Walking down a path lined with pink blossom trees, I remembered the day a funnel of petals were gracefully swirling around me as I cycled to work. It is times like that where I realise and appreciate not just how breathtakingly splendid creation is, but also how transient. Walking down the same path today, the trees are still pink but missing most of their delicate blooms, which were instead adorning the green grass below.

Sitting here still giddy from the sun, I want to share with you yet another gluten free recipe. SPLAT! duty was last week, with the additional request, that not only that these should be gluten and dairy free but now also egg free. So the main components of a cake is basically, dairy (butter), wheat (flour) and eggs.  What happens when all three elements are removed? Some trawling through websites later and I found a perfect recipe on a food forum found here. I am a bit against gluten free flour although must admit it is good in a pinch, but they cost so much I've taken to making up my own mix.  I tend to use 1 part gram flour to 3 parts rice flour. I suspect fine cornmeal (polenta) can be used in place of rice flour too as that is cheaper still! When I get round to trying it, I will report back. Basically I find gram flour adds structure to a cake and acts in many ways as flour does. Its only downfall is its pungent taste when used in too high a proportion and undercooked; blend it with neutral flours though and it acts as a cheap alternative to gluten free flour.

Wandering down South Park today, we encountered a bright red ice cream van. One Mr. Whippy ice cream later, I happily stroll home, with the sun warming my hair celebrating the promise of more such days to come .  Below is my adaptation of the recipe provided in the link above.

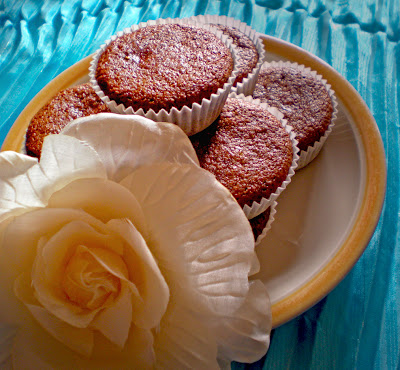
Pear Cupcakes
(Makes 12)

Ingredients:
  • 25g/1oz Gram Flour
  • 75g/3oz Rice Flour
  • 1tsp Baking Powder
  • 0.5tsp Bicarbonate of Soda
  • 50g/2oz Brown Sugar
  • 1 Ripe Pear, grated
  • 2Tbsp Golden Syrup
  • 4Tbsp Sunflower Oil

Method:
  1. Pre-heat the oven to GM5/190C/375F
  2. Sift the dry ingredients (minus sugar) into a bowl to remove lumps, stir in the sugar and mix to combine.
  3. Finely grate the pear directly into the bowl, discarding the resultant lump of skin and pips and mix until well combined.
  4. Pour 1Tbsp of oil oil into the bowl then measure out 1Tbsp of golden syrup then repeat with the oil then golden syrup, then add the last 2Tbsp of oil. This helps the syrup not to stick to the spoon! Beat or whisk the mixture until well combined then spoon equally between 12 cases. 
  5. Bake for about 25 minutes until browned and springy to the touch. 

Thursday 10 March 2011

A Perfectly Civilised Brownie

It's the weekend and I go back to my home town. An urge has been teasing my brain for a while, but cake or biscuits is not what I'm craving. They're just not chocolatey enough... Then one night I'm having a sugar-loaded conversation and I realise what I'm really craving is a soft, rich and gooey brownie.  A fun and longer than necessary trip to the supermarket with my candy loving boy and we're in the kitchen having fun throwing whatever we found into the silky mix of dark chocolate and butter. Putting the ginger marmalade and chocolate loaded mix into the oven, we waited in suspense until the timer beeped that 8 minutes was up. Yup. I did say 8. I got so carried away I failed to read my own handwriting which actually said 30 minutes. The result was a barely solid, sugary gooey puddle which we happily scooped with our fingers. So attempt one failed, and it took me a whole train journey back to Oxford and an extra day to find out why.

I've never failed so badly before so this did sting my inner baker's ego a bit, so much so I wanted a take two. I found myself in my kitchen a few days later, determined to make this recipe work.  I wanted orange and spice, and lots of chocolate.  So back to my notebook I went, reading everything through just to make sure I knew what I was doing, which is when I noticed my error. Suddenly it all made sense and I was calling myself all kinds of silly, but that's okay, I could now proceed with my experiment, confident in a higher chance of success.

Leftover Christmas mixed candied peel came out, crystallised ginger, ground ginger, an orange, extra dark chocolate... all went onto my worktop as I pondered proportions. I decided to err on the side of caution for ground ginger, but added the zest of a whole orange.  I wanted a warm spice mix, but humbled by my weekend disaster, I thought I would keep it simple for now. The result? A warm adult brownie, with bits of ginger and orange playing on the senses. Some tweaks I would consider next time is slightly less mixed peel, more ginger, some mixed spices and a shorter baking time for a softer, gooier brownie. The addition of a handful of nuts is another possibility, maybe walnuts or macadamia...

A Perfectly Civilised Brownie
(Makes about 20-24 squares)

Ingredients:
  • 50g Plain Flour
  • 100g Butter
  • 2 Eggs
  • 100g Dark Chocolate (70%)
  • 175g Granulated Sugar
  • 1 Level tsp Baking Powder
  • 25-50g Stem Ginger, chopped
  • 25-50g Mixed Peel
  • 1tsp Ground Ginger
  • Zest of 1 Orange
Method:
  1. Line a 18x28cm/17x11" tin with baking parchment and pre-heat the oven to GM4/180C/350F.
  2. Mix the ginger, mixed peel and ground ginger together and set aside.
  3. Melt the butter and chocolate together, along with the zest over a double boiler until melted. Beat the mixture until silky smooth.
  4. Remove from heat and beat in the eggs one at a time then the ginger, peel and spice mix until well combined.
  5. Pour into the prepared tin and bake for about 25-30 minutes until firm to the touch.
  6. Cool for 10 minutes and cut into squares.


Saturday 19 February 2011

Cookies and milk go together like...

So lately I've been going through a bit of a nibbling phase, roaming around my house trying to find something to graze on, except... grazing is pretty hard to do when there's no food in the house. Two weeks ago is when I thought I needed to go food shopping, one week ago I thought I seriously need to buy food and today? I still had no food. What's a sick girl to do? Too ill to buy food, too peckish to sit at home without restlessly roaming the house, all that I found were sultanas which were kind of nibble food, porridge oats which are definitely not nibble food and a sealed block of chocolate I feel too guilty about breaking into since it was bought for baking.

Tired though I was, baking was my only option to stop myself going mad, so I stayed in the kitchen thinking about what I could do to fix this dire situation I was in. Flapjacks were considered, but with my sore throat, I didn’t think they were going to go down too well, cakes were another option, but then again they just didn’t seem to fit the bill for once… My mind drifted to the chewy cookies I made recently and I realised I haven’t just been craving nibbles; I was craving chewy cookies! Being house bound, I wanted less sweetness and more wholesome cookies so opted to tweak the basic recipe to yield chewy oat cookies, sweetened by sultanas and chocolate chunks. The result was just what I was hoping for – a cookie full goodness, not overly sweet and satisfied my bad case of the munchies.

Chewy Fruit and Oats Cookie
(Makes 24 small)

Ingredients:
  • 150g Plain Flour
  • ¼ tsp Bicarbonate of Soda
  • 90g Butter/Margerine
  • 50g Dark Brown Muscovado Sugar
  • 100g Granulated White Sugar
  • 1 Large Egg
  • 25g Mixed Fruit/Sultanas
  • 50g Dark Chocolate, chopped
  • 100g Oats, lightly toasted (optional)
Method:
  1. Place the butter in a large pan and melt over a low heat. Meanwhile mix the flour, oats and bicarbonate of soda together well. Set the butter aside to cool slightly.
  2. Beat the sugar into the butter followed by the egg.
  3. Stir in the flour mix until well incorporated, then fold in the chocolate and fruit.
  4. Level the mixture then cover with cling film and refrigerate for at least 30 minutes.
  5. Pre-heat the oven to GM5/190C/375F
  6. Drop teaspoon sized balls onto a baking sheet (I put about 8 on a small tray well spaced) and flatten.
  7. Bake for 10-12 minutes or until the edges have just about turned golden. They'll continue to cook on the tray for 1 minute then cool on a wire rack.

Saturday 12 February 2011

Get lost in the broths...

My birthday lies almost annoyingly close to Christmas, but luckily I have sweet friends who (most of them anyway) understand that wrapping gifts in festive wrapping paper or writing a birthday message in a Christmas card makes for a very sad birthday girl, seriously. If it's disguised as a Christmas present it would probably be banished under the tree, exiled until Christmas day. Luckily, I do not even have awkward birthday moments any more since my lovely mother gave up trying to squeeze ideas for presents out of me by the time I was 18.  Instead I get lovely money and the benefit or having a birthday close to the BIG day is I get both lots in one go... I know, what's a girl to do? Go crazy on clothes? Buy ridiculous shoes? Splurge on something pretty and shiny? Or wonder into Anthropologie one day in January looking for clothes to splurge said money on, but instead getting "lost" in the homeware department and finds herself almost skipping out of the store with her shiny new purchases of... bowls. Yes bowls; but amazing bowls.  So amazing, I had to keep myself from buying one of every colour.  I digress though, there is a point to me mentioning my mad homeware obsession, and that is that they have inspired me to brave making soups again, but not the smooth ones I usually end up cooking up, but interesting thin soups holding delicate chunks of vegetables and grains to make hot, toasty meals perfect for the current climes where the chill is gone but a wet coolness has replaced it, calling for the need for warmth but without the heaviness of winter stodge.

One soup is my all time favourite so it amazes me that I've only made this twice, but it hails from my beloved Cornucopia at Home cookbook and is just love in a bowl.  The hearty broth is cheered up by shreds of deep green kale and cubes of bright orange carrot peeking thorough. The one thing I must say though - and this applies to all broths - is that the stock must be flavourful, as it unites all the components together. I found that this soup tasted better the next day as all the flavours mingled and developed. Next time, some miso or dried shitake mushrooms would make a wonderful base to dish.

The other dish was more accidental, but definitely one I will be making again.  As per usual, inspiration came from a poke around in the fridge to find food which wanted eating followed by a brief exploration of my store cupboard. The Barley, mushrooms and parsnip all pointed to a rather grey soup, so some carrots went in to brighten this meal up.  Some 45 minutes later and I'm happily curled up with my bowl of goodness.  Bon appetit!


Kale and Barley Broth
(Serves 4)

adapted from Cornucopia at Home by Eleanor Heffernan

Ingredients:
Stock:
  • 1 Onion
  • 2 Carrots
  • 2 Sticks of Celery
  • 1 Leek
  • 5 Bay Leaves
  • 10 Black Peppercorns
  • 1 tsp Thyme
  • 2.5L Water
  • Vegetable Oil
Soup:
  • 100g Barley
  • 2 Bay Leaves
  • 1 Onion
  • 2 Carrots
  • 1 Stick of Celery
  • 1 Leek
  • 2 Garlic Cloves
  • 200g Kale, sliced
  • 75g Dill
  • 2L Water
  • Extra Virgin Olive Oil
  • Salt and Pepper
Method:
  1. Cook the barley with 2 bay leaves in plenty of water, bring to the boil then simmer for 45 minutes to an hour until tender with a bite.
  2. Roughly chop the vegetables for the stock and heat some oil in a large pan. Fry gently for 10-15 minutes covered. Add the bay leaves, peppercorns, thyme and water, bring to the boil then gently simmer for 1 hour.
  3.  Strain the stock thoroughly when ready, to get about 2L.
  4. Blanch the kale for 3 minutes or until al dente, quench in cold water and set aside.
  5. To make the soup: Cover the base of a large pan with olive oil and heat. Slice the garlic finely and chop all the vegetables neatly into tiny cubes and sweat gently for 10 minutes, covered.
  6. Add the stock, bring to the boil then simmer for another 10-15 minutes until all the vegetables are tender.
  7. Blend a ladle full of soup with the dill then return to the pan. Add the strained barley and kale, season and serve hot with bread.  
Parsnip and Barley Broth
(Serves 1-2)

Ingredients:
  • 15g Butter
  • 1/4 Large Onion
  • 1 Garlic Clove
  • 1cm Thin Knob of Ginger, grated
  • 1 Stick of Celery, sliced
  • 1 Medium Thin Carrot, thinly sliced
  • 1 Parsnip, cubed into 1cm cubes
  • 2-3 Chestnut Mushrooms, thinly sliced
  • 1/4C/50g Barley
Method:
  1. Melt the butter in a pan and add the onions, garlic and ginger. Cook gently, covered for 5 minutes then add everything but the barley and cook covered for another 5-10 minutes. 
  2. Add the barley and mix to coat then add enough hot water to cover everything twice over (about 700ml), season and bring to the boil. Reduce to a gentle simmer and cook for 45 minutes to 1 hour until the barley is soft with a bite to it. Top up with water if necessary.
  3. Season with salt and pepper and serve.

Friday 11 February 2011

Pasta Comfort

So I've just started up at work again properly, but for some reason it is taking me a lot longer to adjust to being employed in a serious job again.  Over the holidays I worked at my cinema back home, almost daily, almost always long shifts, yet I was fine.  My only conclusion is that my brain is no longer happy trying to pay attention to the likes of law and politics.  Fair enough really, I take my hat off to all you lawyers and politicians out there who have the stamina and genuine curiosity in that area.  I'm sure I will readjust soon, but in the meantime I'll drag my bike and myself up the hill to home sweet home for a comforting bowl of pasta.  At least cooking doesn't take unreasonable amounts of brain power!

Lurking around in my fridge was some leftover cheese sauce from my lasagne made the night before, a couple of mushrooms and scrap ends of cheese, which all went towards making this wonderfully comforting lunch which fed one sleepy person who perked right on up. Enjoy!

Earthy Mushroom Spaghetti
(Serves 1 greedy person)


Ingredients:
  • 75-100g Spaghetti
  • 1/2 Sm Onion
  • 2 Garlic Cloves
  • 15g Butter
  • 100g Chestnut Mushrooms, thinly sliced
  • 25g Manchego (Ewe) Cheese, finely grated (optional)
  • Few Chive strands to garnish
  • About 200ml Leftover Cheese Sauce (or see below to make from scratch)
Cheese Sauce:
  • 1 tsp flour
  • 10g butter
  • 200ml Milk
  • 1/4 tsp Dried Thyme
  • 25g Extra Mature Cheddar, grated
  • Salt and Pepper 
Method:
  1. Boil some salted water for the pasta, then make the cheese sauce - I like my sauce quite thin so I use less flour.  Add more flour if you want it thicker.  Melt 10g butter in a small pan, add the flour and beat around for a minute or so to cook the flour. Whisk in the milk gradually then add the herbs and season. Bring to a simmer, stirring constantly until thickened, add the cheese and set aside.
  2. Add the pasta to the boiling water and cook for about 9-11 minutes until al dente.
  3. Melt the rest of the butter in another pan and fry the garlic and onions gently, covered for 5 minutes until the onions look tender. 
  4. Turn up the heat and add the mushrooms then fry for another 5-10 minutes or until they start to brown.
  5. Season with pepper, mix in the cheese sauce and heat through.
  6. When the pasta is done, drain then mix in with the mushroom sauce until well combined. Stir in most of the Manchego cheese briefly.
  7. Serve sprinkled with the remaining Manchego cheese and garnish with chives.

Scrap Busting the Matryoshka Way

I got gifted this doll pattern from Bee Sew Inspired and it's been on my want to make list since it came out. Initially I had a fleet of...